
You are viewing this post: Best Choice set access point 2022 New
โปรดดูบทความหัวข้อ set access point
How to Set up an Access Point – Explained by LigoWave New Update
If any basic setup is necessary either for the access point or for the network in general, the computer or the user manual should provide instructions on what specific steps to take. Users can also change optional and advanced router settings by connecting to the router via the computer using the IP address 192.168.0.1 or 192.168.1.1 (or the …
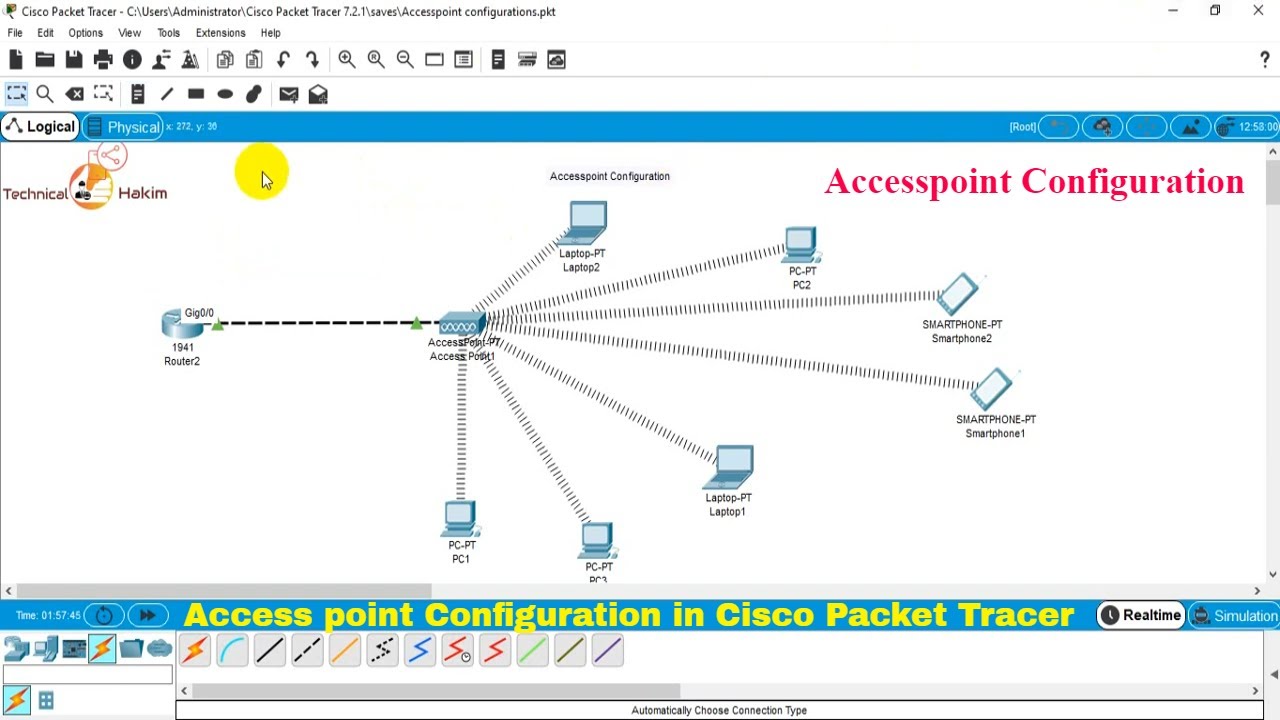
Access point Configuration in cisco packet tracer | Technical Hakim | ccna #AccesspointConfiguration 2022 set access point
ดูข้อมูลที่เป็นประโยชน์เพิ่มเติมในหัวข้อ set access point
Learn how \”Access point Configuration in cisco packet tracer is done \” | Technical Hakim | ccna #AccesspointConfiguration\n——————————————————————————————————————–\nA Wireless Access Point (WAP) is a networking device that allows wireless-capable devices to connect to a wired network. Instead of using wires and cables to connect every computer or device in the network, installing WAPs is a more convenient, more secure, and cost-efficient alternative.\n———————————————————————————————————————-\nAfter watching this video you will get answers to all these below listed queries and also queries related to this topc:\n\nSet up a Wireless Network using a Wireless Access Point (WAP),\nhow to configure access point using packet tracer,\nhow to configure wireless access point cisco packet tracer,\nhow to connect wireless devices in cisco packet tracer,\npacket tracer – configuring wireless lan access,\npacket tracer access point dhcp,\npacket tracer wireless access point,\npacket tracer wireless router,\ndhcp lab packet tracer,\npacket tracer show dhcp pool,\nConfigure DHCP on a Wireless Router,\nCisco Packet Tracer – A simple DHCP Network with Access Point,\nhow to configure wireless access point cisco packet tracer,\nhow to configure wireless router in cisco packet tracer,\npacket tracer access point dhcp,\nwireless access point setup diagram,\nhow to set up simple wireless network in packet tracer,\nhow to simulate a wireless local area network using cisco packet tracer,\npacket tracer connect to a wireless network,\ncisco packet tracer wireless connection,\nHow do I configure my access point in cisco packet tracer?\nhow to configure access point using cisco packet tracer,\nhow to configure and setup access point using packet tracer,\nHow do I setup a wireless access point in Packet Tracer?\nTechnical Hakim, Tech Videos, Networking, Computer Networks, Information Technology, Access point Configuration in cisco packet tracer, packet tracer tutorial, ccna, ccna routing and switching, ccna course for beginners, access point configuration cisco packet tracer, access point configuration, wireless router configuration in cisco packet tracer, DHCP configuration in cisco router, network design in cisco packet tracer, Set up a Wireless Network using a Wireless Access Point (WAP).
set access point ภาพบางส่วนในหัวข้อ
Wireless access point and how to set it up – NetSpot New
03/01/2022 · Most access points look very similar to routers. In fact, modern routers can usually function as access points. Internet Service Providers typically give their customers a router with the functionality of an access point to make the set up simpler.
Định cấu hình Điểm truy cập của Cisco bằng GUI Độc lập / Tự chủ với Khóa xác thực WPAv2 2022 New set access point
ข้อมูลใหม่ในหัวข้อ set access point
#Configure_Cisco_AP #Standalone_GUI #IT_Support_People\n\nIT Support People Facebook Page: \nhttps://www.facebook.com/IT_Support-PeopleDesktop-Support-111268543923018\n\nLink for Other Related Videos:\nConfiguring Cisco Router to Access Internet through ISP Home router:\nhttps://www.youtube.com/watch?v=rRgdlhSbczU\u0026t=2s\n\nConfigure VLAN | Allow VLANs to Access Internet\nhttps://www.youtube.com/watch?v=-JeubKTW8-w\u0026t=158s\n\nIn this video I’ve shown step by step process How to Configure Cisco AIRONET 3602i Autonomous/Standalone Access Point using GUI with WPAv2 Authentication Key. I’ve divided the whole process into two parts which are given below:\n \nPart 1: Accessing Cisco Aironet Access Point GUI Web Interface\n \n • Console the Access Point with Putty (default user name and Password: Cisco)\n • Resetting to factory Default Settings Using the MODE Button \n • Check IP status and Assign a static IP to BVI1 interface with same subnet mask \n • Go to Web Browser and type http://BVI1 interface IP address (keep user name blank and default Password: Cisco)\n\nPart 2: Configuring Aironet Access Point with WPAv2 Authentication in GUI \n 1. In Easy Setup \n Under Network Configuration\n –Edit AP hostname, Static IP, Subnet mask and Default Gateway\n Under In Radio Configuration \n –Create SSID name WLAN_New under Radio 2.4GHz and select Broadcast SSID in Beacon\n 2. Apply Encryption Modes to AES CCMP\n 3. Enable WPAv2 and apply WPA Pre-shared Key: to SSID \n 4. Enable Wireless Radio Interface (Radio0-802.11N2.4GHz/ Radio1-802.11N5GHz) UP \n 5. Save the configuration\n 6. Finally check the SSID Wi-Fi connection, Security Key, IP address and browsing through internet\n\n\n\nCover Topic:\nHow to configure Cisco AP, \nHow to Configure Standalone Cisco Access Point, \nConfigure Cisco AIRONET 3602i Autonomous/Standalone Access Point using GUI, \nHow to Configure Cisco Standalone/Autonomous Access Point using GUI,\nCisco access point configuration step by step GUI,\nHow to configure standalone Cisco access point from GUI, \nHow to Configure a Cisco Wireless Access-Point (AP) from GUI,\n\nHow to configure standalone Cisco access point from GUI,\nWPAv2 Authentication Key, Encryption AES CCMP, \nCisco AP Wireless Radio Interface Radio0-802.11N2.4GHz/ Radio1-802.11N5GHz,\nCreate Cisco AP SSID GUI, Enable WPAv2 and WPA Pre-shared Key, \n\ncisco 3602i standalone configuration,\n\nResetting Cisco AP to factory Default Settings Using the MODE Button, \nCisco IOS Configuration Guide for Autonomous Aironet,\ncisco autonomous ap configuration example, \nhow to access cisco ap web interface, \ncisco ios configuration guide for autonomous aironet access points,\nCisco Autonomous Wireless Network – Home style configuration, \nConfiguring the Access Point for the First Time,\nSSID on Autonomous AP Configuration Example, \nCisco Autonomous AP – Initial Setup \u0026 Open SSID Creation,\n\nAutonomous AP – Initial Setup \u0026 Open SSID Creation, \nUsing the Web-Browser Interface Cisco Aironet 3600 Series, \nSSID on Autonomous AP Configuration Example – Cisco, \nhow to access cisco ap web interface, \nhow to configure cisco access point without controller, \nHow do I assign an IP address to a Cisco access point, \nHow do I access my Cisco wireless access point,\n\nhow to configure cisco wireless access point via console,
set access point คุณสามารถดูภาพสวย ๆ ในหัวข้อ

Configuring Access Points – Cisco ล่าสุด
able to log into an access point’s console port. If necessary, you can clear the access point configuration to return the access point username and password to the default setting. Follow these steps to establish a global username and password. Step 1 Choose Configure > Controllers or Configure > Access Points.
+ อ่านข้อมูลเพิ่มเติมได้ที่นี่
Unifi AP – Thiết lập lần đầu 2022 set access point
ข้อมูลเพิ่มเติมเกี่ยวกับหัวข้อ set access point
In this video, I go over how to configure a Unifi Access Point for the first time. If you don’t quite know how to install one of these access points and configure it, just follow the steps in this video and get it running in no time.\n\nNow, there is also a mobile app version of the controller software you can use instead of the PC-based controller, but I don’t go over that in this video.\n\nI know this doesn’t technically belong in the Edgerouter playlist, but I don’t really have a home for anything Unifi right now.\n\nThis video was a response to a request by user R Gb. If you have any comments or suggestions for other videos leave them down below and I will get to them when (and if) I can.
set access point คุณสามารถดูภาพสวย ๆ ในหัวข้อ

Set Up the Access Point – Netgear New 2022
Before mounting the access point in a high location, first set up, configure, and test the access point to verify WiFi network connectivity. Make sure that you are running the latest firmware version on your device. ¾ To set up the access point with a PoE switch: Connect an Ethernet cable from the yellow WAN PoE port on the access
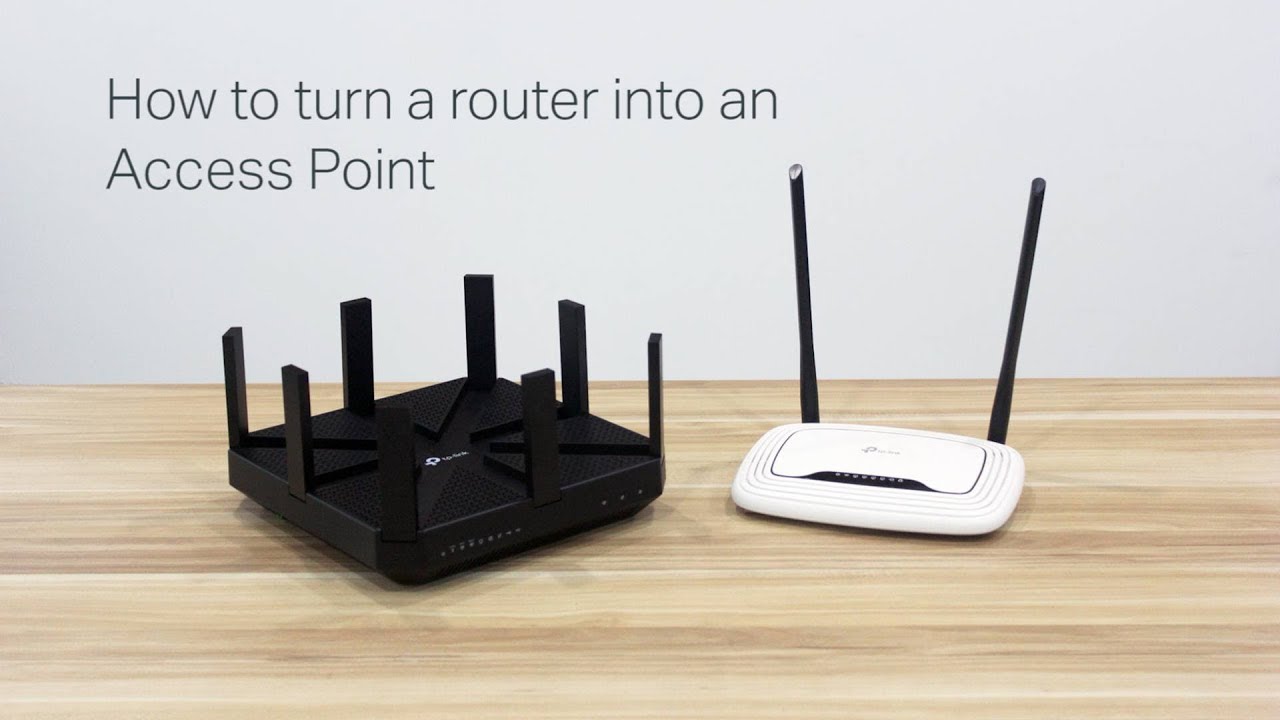
How to turn a router into an Access Point 2022 set access point
ข้อมูลใหม่ในหัวข้อ set access point
This video will demonstrate how to turn a router into an access point including 2 parts:\n• If the router supports Access Point mode\n• If the router doesn’t support Access Point mode\n\n\nTHIS VIDEO APPLIES TO:\n• Routers with or without Access Point mode\n\nFIND US AND FOLLOW US:\n\nFacebook: https://www.facebook.com/TPLINK.NA\nTwitter: https://twitter.com/tplinkna, @TPLINKNA\nLinkedIn: https://www.linkedin.com/company/tp-link-usa\nWebsite: http://www.tp-link.com/support\n\nBe the first to see the latest tips,skills and knowledge from TP-LINK. Subscribe here: https://www.youtube.com/channel/UCLp_URaAod44UHCZWH56Bpw
set access point ภาพบางส่วนในหัวข้อ
Help Guide | Access Point Set. New Update
When the desired access point is displayed on the screen: Select the desired access point. When the desired access point is not displayed on the screen: Select [Manual Setting] and set the access point. * For the input method, refer to “How to use the keyboard.” If you select [Manual Setting], input the SSID name of the access point, then select the security system.
Thiết lập Raspberry Pi của bạn làm điểm truy cập không dây (Cập nhật!) Update set access point
อัพเดทใหม่ในหัวข้อ set access point
Hello guys, in this video I am going to show you how to set up your Raspberry Pi as a wireless access point.\nI hope you enjoy the video, if you have any question or feedback, please leave a comment down below. \n\n\n\n⌚️Timestamps:\n\n0:00 | Introduction \n\n0:55 | Installing the software \n\n2:31 | Setting a static IP address \n\n3:27 | Enabling the routing \n\n3:45 | Firewall rule \n\n4:23 | Configuring the DNSmasq \n\n5:24 | Unblocking the wifi \n\n5:33 | Configuring the Hostapd \n\n7:03 | Testing the access point \n\n7:38 | Thank you \n\n\n\n💻The commands and settings used in the video: \n\nsudo apt update \n\nsudo apt upgrade \n\nsudo apt install hostapd \n\nsudo systemctl unmask hostapd \n\nsudo systemctl enable hostapd \n\nsudo apt install dnsmasq \n\nsudo DEBIAN_FRONTEND=noninteractive apt install -y netfilter-persistent iptables-persistent \n\nsudo nano /etc/dhcpcd.conf \n\ninterface wlan0 \n\nstatic ip_address=192.168.4.1/24 \n\nnohook wpa_supplicant \n\nsudo nano /etc/sysctl.d/routed-ap.conf \n\nnet.ipv4.ip_forward=1 \n\n\n\nsudo iptables -t nat -A POSTROUTING -o eth0 -j MASQUERADE \n\nsudo netfilter-persistent save\nsudo mv /etc/dnsmasq.conf /etc/dnsmasq.conf.old \n\nsudo nano /etc/dnsmasq.conf \n\ninterface=wlan0 \n\ndhcp-range=192.168.4.2,192.168.4.20,255.255.255.0,24h \n\ndomain=wlan \n\n\n\nsudo rfkill unblock wlan \n\nsudo nano /etc/hostapd/hostapd.conf \n\n\n\n#Access point with password (WPA2): \n\ncountry_code=GB \n\ninterface=wlan0 \n\nssid=YourNetworkName \n\nhw_mode=g \n\nchannel=7 \n\nmacaddr_acl=0 \n\nauth_algs=1 \n\nignore_broadcast_ssid=0 \n\nwpa=2 \n\nwpa_passphrase=YourPassword \n\nwpa_key_mgmt=WPA-PSK \n\nwpa_pairwise=TKIP \n\nrsn_pairwise=CCMP \n\n\n\nCheck your country code: localectl status\n \n\nIf you want your access point to be open(no password):\ninterface=wlan0 \n\ndriver=nl80211 \n\nssid=YourNetworkName \n\nhw_mode=g \n\nchannel=6 \n\nsudo reboot \n\n\n\n🎵Music by:\n\n\”Sappheiros – Dawn\” is under a Creative Commons license (CC BY 3.0) Music promoted by BreakingCopyright: http://bit.ly/2OBe00v
set access point คุณสามารถดูภาพสวย ๆ ในหัวข้อ

SG :: How to set a Wireless Router as an Access Point Update New
22/11/2007 · In this figure, my new wireless router/access point is set to use 192.168.1.2 as its IP address, and I’ve disabled DHCP, so it will not interfere with the DHCP server from my gateway. It is important to have only one device acting as a DHCP server, and that the IP address of the access point is in the same range as the main router.
NanoStation M2 – Access Point setup 2022 New set access point
ข้อมูลเพิ่มเติมเกี่ยวกับหัวข้อ set access point
Configure NanoStation M2 as Access Point\n\nبرمجة نانو ستايشن ام تو على وضعية الناشر
set access point ภาพบางส่วนในหัวข้อ

4 – Configuring the Access Point for the First Time New 2022
Step 6 After the access point/bridge reboots, you can reconfigure the access point by using the Web-browser interface if you previously assigned a static IP address, or the CLI if you did not. The access point is configured with the factory default values including the IP address (set to receive an IP address using DHCP), from privileged EXEC mode.
Ubiquity Picostation M2-HP – Access Point – Cách thiết lập mạng không dây Update set access point
ข้อมูลเพิ่มเติมเกี่ยวกับหัวข้อ set access point
How to set up a Ubiquiti Pico Station AP unit.\nSee my other Picostation set up and how to videos here\nhttp://www.youtube.com/playlist?list=PLqagIrU4ukVAwGN46C4a2FvXCwm8Pqawb
set access point ภาพบางส่วนในหัวข้อ

Configuring the Access Point for the First Time – Cisco … New 2022
04/12/2013 · The 1300 series access point/bridge assumes a radio network role of a root access point. To configure it as a bridge, you must manually place it in install mode in order to align the antennas and establish a link. To establish the link you must have two access point/bridges configured in the install mode. In the install mode, one access point …
+ อ่านข้อมูลเพิ่มเติมได้ที่นี่
Ubiquiti: Cách thiết lập Cầu nối điểm tới điểm New 2022 set access point
ข้อมูลใหม่ในหัวข้อ set access point
An overview video for configuring a point to point bridge using Ubiquiti M Series devices
set access point ภาพบางส่วนในหัวข้อ

How to turn a router into an Access Point – YouTube 2022 Update
28/12/2017 · This video will demonstrate how to turn a router into an access point including 2 parts:• If the router supports Access Point mode• If the router doesn’t sup…
+ อ่านข้อมูลเพิ่มเติมได้ที่นี่
Thiết lập WiFi Toàn bộ Gia đình với Điểm truy cập Doanh nghiệp – Mở hộp \u0026 Đánh giá Update 2022 set access point
ข้อมูลใหม่ในหัวข้อ set access point
See these on Amazon: https://amzn.to/31cNQgY\n\nMy blog: http://hometechdiy.com/ubiquitiapreview/\n\nI need to extend my Wifi coverage in my house so I have a strong connection on all floors and even around the perimeter. My current modem and router combination unit is located in the corner of my basement and I want to keep it there. To extend Wifi network, I will be unboxing, configuring and installing 2 Ubiquiti UAP-AC-PRO-E Access Point. I review the features, unbox the product, and test its functionality. Finally, I test to ensure my WiFi signal has improved. If you are not seeing the expected results you may need to change your channels, power levels and/or wave width.
set access point รูปภาพที่เกี่ยวข้องในหัวข้อ
วิธี Set Access Point TP-LINK (TL-WA801ND) – YouTube Update New
20/12/2016 · Set Access Point TP-LINK (TL-WA801ND) ในโหมด1.Access Point2.Repeater(Range extender)ขอบคุณทุกคนที่เข้ามาชม หากผิดพลาด …
How to Configure | Mikrotik Metal 2shpn | 2.4 Ghz As an Access point Update set access point
ดูข้อมูลที่เป็นประโยชน์เพิ่มเติมในหัวข้อ set access point
High Performance \u0026 long Distance Coverage\nIf any problem you can comment.
set access point คุณสามารถดูภาพสวย ๆ ในหัวข้อ
ดูข้อมูลหัวข้อเพิ่มเติม set access point
How to set up Access Point Name (APN) on Samsung Mobile … ล่าสุด
19/11/2020 · Access Point Name (APN) is the name of a gateway to connect your carrier’s celluar network to the internet. To set up APN on your Mobile Device, follow these steps: 1 Tap Settings. 2 Tap Connections. Please note: Skip this step for older models. 3 Tap Mobile Networks. 4 Tap Access Point Names.
+ อ่านข้อมูลเพิ่มเติมได้ที่นี่
Access point Configuration in cisco packet tracer | Technical Hakim | ccna #AccesspointConfiguration 2022 set access point
ดูข้อมูลที่เป็นประโยชน์เพิ่มเติมในหัวข้อ set access point
Learn how \”Access point Configuration in cisco packet tracer is done \” | Technical Hakim | ccna #AccesspointConfiguration\n——————————————————————————————————————–\nA Wireless Access Point (WAP) is a networking device that allows wireless-capable devices to connect to a wired network. Instead of using wires and cables to connect every computer or device in the network, installing WAPs is a more convenient, more secure, and cost-efficient alternative.\n———————————————————————————————————————-\nAfter watching this video you will get answers to all these below listed queries and also queries related to this topc:\n\nSet up a Wireless Network using a Wireless Access Point (WAP),\nhow to configure access point using packet tracer,\nhow to configure wireless access point cisco packet tracer,\nhow to connect wireless devices in cisco packet tracer,\npacket tracer – configuring wireless lan access,\npacket tracer access point dhcp,\npacket tracer wireless access point,\npacket tracer wireless router,\ndhcp lab packet tracer,\npacket tracer show dhcp pool,\nConfigure DHCP on a Wireless Router,\nCisco Packet Tracer – A simple DHCP Network with Access Point,\nhow to configure wireless access point cisco packet tracer,\nhow to configure wireless router in cisco packet tracer,\npacket tracer access point dhcp,\nwireless access point setup diagram,\nhow to set up simple wireless network in packet tracer,\nhow to simulate a wireless local area network using cisco packet tracer,\npacket tracer connect to a wireless network,\ncisco packet tracer wireless connection,\nHow do I configure my access point in cisco packet tracer?\nhow to configure access point using cisco packet tracer,\nhow to configure and setup access point using packet tracer,\nHow do I setup a wireless access point in Packet Tracer?\nTechnical Hakim, Tech Videos, Networking, Computer Networks, Information Technology, Access point Configuration in cisco packet tracer, packet tracer tutorial, ccna, ccna routing and switching, ccna course for beginners, access point configuration cisco packet tracer, access point configuration, wireless router configuration in cisco packet tracer, DHCP configuration in cisco router, network design in cisco packet tracer, Set up a Wireless Network using a Wireless Access Point (WAP).
set access point ภาพบางส่วนในหัวข้อ
How To Setup a Point To Point Wireless Access Point Link … New 2022
25/05/2016 · Set a custom password and secured your Ubiquiti access point; Set the correct Time Zone on the device . Step 5: Configure the AP to Access Point Mode. To properly configure two wireless access points to communicate to each other, you have to configure one as an Access Point and the other as a Client Radio. First we will set the Access Point …
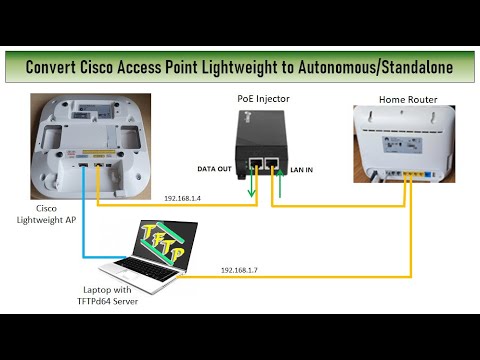
Chuyển đổi Điểm truy cập của Cisco từ Nhẹ sang Tự trị / Độc lập New 2022 set access point
ข้อมูลเพิ่มเติมเกี่ยวกับหัวข้อ set access point
#Cisco_AP #Conversion #IT_Support_People\n\nStep by Step Process Converting Cisco Aironet 3600 Series Access Point from Lightweight to Autonomous version.\n\nRequirements:\n 1.TFTPd64 Server\n 2.Cisco IOS Software AP3G2-K9W7-M for (C3600 Series AP)\n 3.The Cisco AP and the Laptop with TFTP server must be in same network.\n\nAccording to my network setup\n Lightweight AP BVI1 IP address is 192.168.1.4\n Laptop’s IP address where TFTP server is installed 192.168.1.7 [Default Router IP]\n\nFirst disconnect the Ethernet cable from the AP then Press the Mode button and Put back the Ethernet cable to the AP and hold the Mode button Until flash light turns to umber and Once the Lightweight AP goes to online then apply the following commands to convert it to Autonomous version:\n\nset IP_ADDR 192.168.1.4 [According to my network setup]\nset NETMASK 255.255.255.0 [According to my network setup]\nset DEFAULT_ROUTER 192.168.1.7 [According to my network setup]\ntftp_init \nether_init \nflash_init \ntar -xtract tftp://192.168.1.7/ap3g2-k9w7-tar.153-3.JH.tar flash:\ndir flash\nset boot flash:/ap3g2-k9w7-mx.153-3.JH/ap3g2-k9w7-mx.153-3.JH\nset\n\nboot\n\n\n==========================\n\n\nIT Support People Facebook Page: \nhttps://www.facebook.com/IT_Support-PeopleDesktop-Support-111268543923018\n\nLink for Other Related Videos and necessary files:\n\nConfigure Cisco Access Point Standalone/Autonomous using GUI with WPAv2 Authentication Key:\nhttps://www.youtube.com/watch?v=AwuWsGGofT4\u0026t=550s\n\nConfigure Standalone Cisco Access Point from CLI with WPAv2 Authentication:\nhttps://youtu.be/JkUfTXuwj2U\n\nConfiguring Cisco Router to Access Internet through ISP Home router:\nhttps://www.youtube.com/watch?v=rRgdlhSbczU\u0026t=2s\n\nConfigure VLAN | Allow VLANs to Access Internet\nhttps://www.youtube.com/watch?v=-JeubKTW8-w\u0026t=158s\n\nConnect Cisco Router using PuTTY \u0026 Console Cable | Change Text Color/ Font Size/ Background on PuTTY:\nhttps://www.youtube.com/watch?v=WQeAe8_vbLI\u0026t=43s\n\nReset Cisco Access Point to Factory Defaults using Mode Button:\nhttps://youtu.be/eGCnTWBEpp8\n\nDownload Link for TFTPd64 Server:\nhttp://tftpd32.jounin.net/tftpd32_download.html\n\nDownload Link for IOS image of Cisco Aironet 3600 Series Standalone Access Point (AP3G2-K9W7-M):\nhttps://drive.google.com/file/d/1LORJAC8yp9F4_nANquHw8awZeXlbt1Vx/view?usp=sharing\n\n\nCovered Topics:\nLightweight to Autonomous (vice versa) Conversion,\nConverting Cisco Wireless Access Point from Lightweight Mode to Autonomous Mode and Vice Versa,\nLWAPP to Autonomous Conversion and Vice versa on Access Points,\nHow to convert a Cisco AP from Lightweight to Autonomous (CAP to SAP),\nConvert Cisco Lightweight AP to Autonomous,\nAccess Points Light Weight to Autonomous Conversion and vice versa,\nconvert lightweight to autonomous 2700\nCisco 3602i autonomous image download,\nCisco AP standalone mode,\nhow to check Cisco AP is lightweight or autonomous,\nautonomous AP IOS software download,\nCisco autonomous AP configuration example,\nautonomous to lightweight mode upgrade tool,\nCisco AP lightweight vs autonomous,\nDownload IOS image AP3G2-K9W7-M for Cisco AP,\nConverting a Cisco AP from LWAPP to Autonomous mode,\nHow to convert Cisco air AP from CAPWAP to autonomous,
set access point รูปภาพที่เกี่ยวข้องในหัวข้อ
How to configure the TP-Link wireless router as Access Point? Update 2022
24/12/2021 · 5. After successfully login, select Access Point mode and follow the Quick Setup to complete the configuration. How to change to Access Point mode: Go to (Advanced)–>Operation Mode or Advanced–>System Tools–>Operation Mode.
+ อ่านข้อมูลเพิ่มเติมได้ที่นี่
Định cấu hình Điểm truy cập của Cisco bằng CLI với Xác thực WPAv2 Update set access point
ข้อมูลใหม่ในหัวข้อ set access point
#Cisco #Configure_AP #IT_Support_People\n\nIT Support People Facebook Page: \nhttps://www.facebook.com/IT_Support-PeopleDesktop-Support-111268543923018\n\nLink for Other Related Videos:\n\nConfigure Cisco Access Point Standalone/Autonomous using GUI with WPAv2 Authentication Key:\nhttps://www.youtube.com/watch?v=AwuWsGGofT4\u0026t=550s\n\nConfiguring Cisco Router to Access Internet through ISP Home router:\nhttps://www.youtube.com/watch?v=rRgdlhSbczU\u0026t=2s\n\nConfigure VLAN | Allow VLANs to Access Internet\nhttps://www.youtube.com/watch?v=-JeubKTW8-w\u0026t=158s\n\nConnect Cisco Router using PuTTY \u0026 Console Cable | Change Text Color/ Font Size/ Background on PuTTY:\nhttps://www.youtube.com/watch?v=WQeAe8_vbLI\u0026t=43s\n\n\nIn this video I’ve shown step by step process How to Configure Cisco AIRONET 3602i Autonomous/Standalone Access Point using CLI with WPAv2 Authentication Key. I’ve divided the whole process into three steps which are given below:\n\n ===== For 2.4 GHz Radio Interface ====\n\nStep 1: Access Cisco AP|Reset AP| Assign static IP for BVI1 Interface |Default-gateway IP\nenable\nPassword: Cisco [Cisco AP default Password]\n## Reset the Access Point with pressing and holding mode button ##\nap#configure terminal\nap(config)#interface bvI 1\nap(config-if)#ip address 192.168.2.4 255.255.255.0 [According to my network setup]\nap(config-if)#exit\nap(config)#ip default-gateway 192.168.2.1 [According to my network setup]\n\nStep 2: Creating SSID | Authentication | Applying WPAv2 Authentication\n\nap(config)#dot11 ssid Cisco_WLAN \nap(config-ssid)#guest-mode \nap(config-ssid)#authentication open \nap(config-ssid)#authentication key-management wpa version 2 \nap(config-ssid)#wpa-psk ascii Cisco123 \nap(config-ssid)#exit\n\nStep 3: Enable Encryption to 4.2GHz Radio interface | Apply SSID to interface| Enable Radio Interface\n\nap(config)#interface dot11Radio 0 \nap(config-if)#encryption mode ciphers aes-ccm \nap(config-if)#ssid Cisco_WLAN \nap(config-if)#channel least-congested \nap(config-if)#no shutdown \nap(config-if)#exit\nap(config)#exit\n ==== For 5 GHz Radio Interface ===\n\nStep 2: Creating SSID | Authentication | Applying WPAv2 Authentication\n\nap(config)#dot11 ssid Cisco_WLAN 5GHz \nap(config-ssid)#guest-mode \nap(config-ssid)#authentication open \nap(config-ssid)#authentication key-management wpa version 2 \nap(config-ssid)#wpa-psk ascii Cisco123 \nap(config-ssid)#exit\n\nStep 3: Enable Encryption to 5 GHz Radio interface | Apply SSID to interface| Enable Radio Interface\n\nap(config)#interface dot11Radio 1 \nap(config-if)#encryption mode ciphers aes-ccm \nap(config-if)#ssid Cisco_WLAN 5GHz \nap(config-if)# channel 36 \nap(config-if)#no shutdown \nap(config-if)#exit\n\n\nCover Topic:\n\nHow to configure Cisco AP, \nHow to Configure Standalone Cisco Access Point, \nConfigure Standalone Cisco Access Point from CLI with WPAv2 Authentication, \nConfigure Cisco Aironet 3602i Autonomous Access Point, Autonomous AP CLI, \nCisco autonomous ap configuration guide cli,\nAutonomous AP – Initial Setup,\nCisco autonomous ap configuration multiple ssid,\ncisco autonomous ap configuration example,interface dot11Radio 1, \ncisco autonomous ap configuration guide cli 2.4 GHz and 5GHz Radio, \ninterface dot11Radio 0, Cisco, AP, Cisco Autonomous CLI Commands, \nHow to Configure Cisco Standalone/Autonomous Access Point using CLI, \nHow to Configure a Cisco Wireless Access-Point (AP) from CLI, \nConfigure Cisco AIRONET 3600 Autonomous/Standalone Access Point, \nHow to configure cisco wireless access point via console, \nHow to configure standalone Cisco access point from CLI, \nWPAv2 Authentication Key, \nEncryption AES CCMP, \nCisco AP Wireless Radio Interface Radio0-802.11N2.4GHz/ Radio1-802.11N5GHz, \nCreate Cisco AP SSID CLI, \nconfigure wpa2 on cisco aironet, \ncisco 3602i standalone configuration, \nResetting Cisco AP to factory Default Settings Using the MODE Button, \ncisco autonomous ap configuration example, \nCisco Autonomous Wireless Network – Home style configuration, \nConfiguring the Access Point for the First Time, \nCisco Autonomous AP – Initial Setup \u0026 Open SSID Creation,
set access point ภาพบางส่วนในหัวข้อ

How to set iPhone as access point – Techswizz Update New
13/05/2020 · Set up an iPhone access point quickly . If you have iOS 13 installed on your iPhone, the fastest way to turn on a Hotspot or access point is to do this: On an iPhone X, XS, XR, or iPhone 11, drag down from the top corner to open the Control Center. On an older iPhone, swipe up from the bottom to open the Control Center.
OPPO All Mobile || How To Set Access Point Name In Oppo 2022 set access point
อัพเดทใหม่ในหัวข้อ set access point
Agr apko OPPO ke phone Mai access point name Ko set karna ho toh kaise laga sakte hai our calling our internet Ko kaise fast kar sakte hai OPPO ke model Mai Jaise A77,A39,A57 ,A31,F1 F1s,F7,A83,F5, in sabhi Mai APN Ko add karna bataya Gaya hai is video Mai
set access point ภาพบางส่วนในหัวข้อ

Installing and Configuring the Access Point – Cisco New
Configuring Radio Channels on the Access Point Follow these steps to configure a radio channel for your 1810 Series OfficeExtend access point. Step 1 Access the 1810 Series OfficeExtend access point GUI as described in “Accessing the GUI” section on page 2-1.
+ อ่านข้อมูลเพิ่มเติมได้ที่นี่
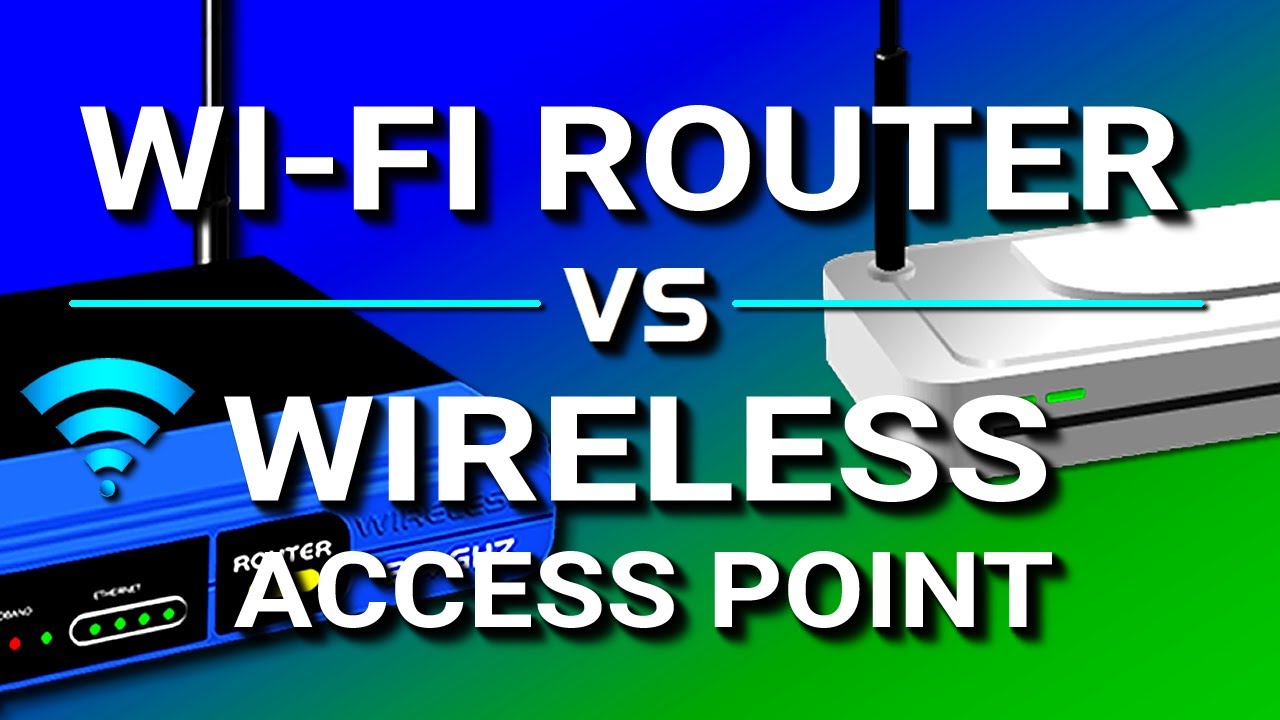
Điểm truy cập không dây so với Bộ định tuyến Wi-Fi 2022 Update set access point
อัพเดทใหม่ในหัวข้อ set access point
What is the difference between a wireless access point and a Wi-Fi router? A Wi-Fi router is what allows multiple wired and wireless devices to join together in a local area network. A wireless access point relays data between a wired network and wireless devices.\n\nGet the VPN that I use (affiliate). https://nordvpn.com/powercert\nUse coupon code ‘powercert’ and get 68% off a 2-year plan + 4 months free.
set access point รูปภาพที่เกี่ยวข้องในหัวข้อ
How to Set up Access Point Names (APN) – Oppo Manual … 2022 New
27/08/2021 · An access point is needed to send or receive SMS/MMS on the Oppo-Smartphone. Mobile data also needs a correctly configured access point. APN data is usually configured after dialing into the network, but can also be added manually.
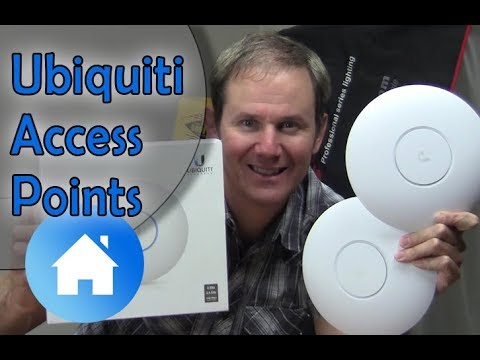
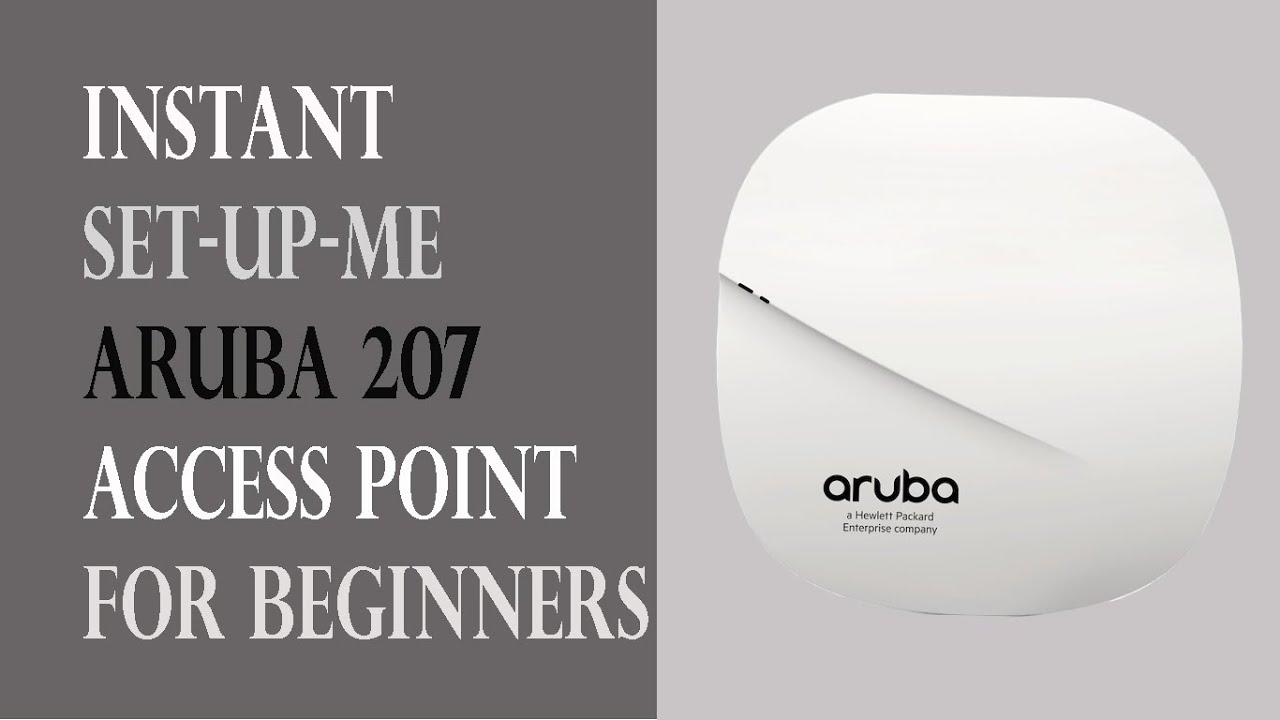
Setting Up Aruba 207 Instant Access Point for Beginners Update set access point
ข้อมูลเพิ่มเติมเกี่ยวกับหัวข้อ set access point
Setting up Aruba 207 Instant Access Point for beginners.\n\nIn this video, I focus on access points and how to configure and instant set-me-up.\n\n#aruba #arubasetup #arubasetmeup #technical guru #networking #accesspoints
set access point คุณสามารถดูภาพสวย ๆ ในหัวข้อ
How to set up Deco to work in Access Point mode? | TP-Link Update 2022
11/01/2022 · Note: Deco needs to be set up via Deco APP first before being able to switch to Access Point mode. Access Point mode aims to extend the existing wired network and expand the wireless coverage for a home network. At this time, the Deco system will not create its own subnet but purely forward data between the root router and the clients. Note: 1.
Cấu hình điểm truy cập MikroTik New Update set access point
ข้อมูลใหม่ในหัวข้อ set access point
Support the Channel:\nBe a Patreon: https://www.patreon.com/inquirinity\nBe a Subscriber: https://www.youtube.com/inquirinity\n\nBuy me a Coffee:\nhttps://www.buymeacoffee.com/inquirinity\n\nCredits:\nThumbnail: Canva\n\nHow to configure your MikroTik device as an access point?\nThis video tutorial discuss the following:\n1. Default configuration\n2. View System License\n3. View System Package\n4. Use MikroTik Wireless built-in tools\n5. Wireless menu walk-through\n6. Configure wireless interface as an access point\n7. Test AP configuration
set access point คุณสามารถดูภาพสวย ๆ ในหัวข้อ
Make your Windows laptop work as a Wi-Fi access point 2022 New
This creates the access point, but it’s not fully operational yet: you need to tell Windows that you want to share your actual Internet connection with the access point you’ve just created. To do that, use Windows Control Panel to open the Network and Sharing Center window. There, click on the connection that provides the actual connection to …
+ อ่านข้อมูลเพิ่มเติมได้ที่นี่
How to configure Nanostation M2 as Accesspoint (Ap) | Technical Hakim New Update set access point
อัพเดทใหม่ในหัวข้อ set access point
How to configure Nanostation M2 as Accesspoint (Ap) | Technical Hakim, \nUbiquiti NanoStation M2 Setup as wired Range Extender Easy Step by Step (Bridge Mode)\n=========================================================================\n1. Nano Station M2 (NSM2) Setup as Access point: https://youtu.be/BUaC3T4Hj_o\n#NSM2 #NSM2Setup\n\nProcedures for Configuring your NanoStation:\nHere i will configure the NanoStation to act as a WiFi Access Point.\n\nWhile the device can be configured over the network, it’s often easier to perform configuration when the LAN cable is plugged directly into the Ethernet jack on your computer.\n\nConfiguration is performed using your web browser by typing in https://192.168.1.20.\n\nYou’ll get a warning pop up stating that the device has presented an invalid SSL certificate due to the certificate being self-signed and not issued by a CA. This is normal, so just hit accept/continue.\n\nYou’ll then need to log in with the default username and password of \”ubnt\”.\n\n Configure the Wireless tab:\n\nThe first step is to configure the wireless tab so the NanoStation acts as a WiFi Access Point.\n\nChange the settings according to the below picture. Be sure to set the device up with WPA2 security and an appropriate WiFi password here.\n\nYou can also use this tab to adjust the power output should you wish to cover a smaller area.\n\nThe default channel bandwidth is 40MHz, but some older devices such as wireless printers and mobile phones cannot operate on 40MHz, so we’ve changed it to 20MHz in this setup.\n\nConfiguring nanostation via airos 5.5 as wireless access point\n\nTurn off airMAX:\nNavigate to the left-most tab (with the Ubiquiti logo) and uncheck the airMAX checkbox to disable Ubiquiti’s proprietary airMAX protocol (a special MIMO TDMA multiplexing technique that allows communication between two or more Ubiquiti devices).\n\nYou won’t be able to untick the box until the wireless tab has been completely configured.\n\n Disable airmax protocol airos 5.5\n\nConfigure Network Settings:\nFinally, it’s time to configure the network settings to reflect that of your existing network and modem.\nIn our case the Telstra Cable modem is located at 192.168.0.1 with a subnet mask of 255.255.255.0, meaning all our devices are restricted to the 192.168.0.XXX subnet.\n\nThis means that we’ve had to change the default 192.168.1.20 to 192.168.0.20.\n\nAs we want the cable modem to continue controlling the network, we’re setting the NanoStation to Bridge mode, and then assigning the Default Gateway and DNS IP addresses to the address of the modem (192.168.0.1).\n\nThe secondary DNS server is set to 8.8.8.8 (Google’s DNS server), but this isn’t important. Of course these are our network settings, your settings will undoubtedly be different, so make sure you configure them accordingly.\nAfter the configuration is done, plug or connect the one end ethernet cable or lan cable to primary or main router’s LAN port for internet accessibility. \n=======================================================================\nHow to configure and Setup Nanostation M2 as Accesspoint (Ap), #TechnicalHakim #NanostationM2Setup How to install Ubiquiti Routers, How to setup ubnt nanostation m2 as AP, Station, Ap-repeater in bridge, router or soho-router mode, #NanostationM2Configuration Rocket m2 setup and configuration as Accesspoint (AP) and Station or as Ap- Repeater.\nTechnical Hakim,Tech Videos,Networking,Computer Networks,Information Technology,How to configure Nanostation M2 as Accesspoint (Ap) | Technical Hakim,how to setup nanostation m2 as repeater,nanostation m2 setup,nanostation loco m2,nanostation m2,nanostation m2 hotspot setup,how to configure nanostation m2 as accesspoint.\nHow to extend WiFi coverage using an Ubiquiti NanoStation M2.\nIn this video i have shown how to setup or configure ubnt/ubiquiti Nanostation M2 as Ap(accesspoint) to work as range extender or long distance coverage.\nHope you find the video informative. Do comment below about any queries related and Subscribe the channel for more updates.\nThank You, Make a good Day ahead…!!!
set access point ภาพบางส่วนในหัวข้อ

How to Create a Wi-Fi Hotspot on your Windows 10 PC … Update New
19/06/2018 · To turn on the access point, it is enough to click the toggle “Share your Internet connection with other devices“. The name of the new Wi-Fi network and the password will be generated automatically (you can change them). Select the Internet connection that you want to share with other devices (Share my Internet connection from). If your …
Modem, Router, AP, Repeater giống \u0026 khác nhau như thế nào? Lựa chọn ra sao? New 2022 set access point
อัพเดทใหม่ในหัวข้อ set access point
Các bạn hãy tham khảo ngay bài viết này để rõ hơn nhé: https://www.totolink.vn/article/115-phan-biet-su-khac-nhau-giua-router-modem-va-access-point.html\n#totolink\n#router\n#repeater\n\n================================= \n👉Tham khảo các sản phẩm TBM của TOTOLINK: https://www.totolink.vn/\nCác tính năng của cổng USB trên Router: https://youtu.be/acr9PsVcMdM\nCách đổi mật khẩu Wifi đơn giản: https://youtu.be/tNu3LKVaZ6E\nCấu trúc địa chỉ MAC : https://youtu.be/QlrOWRrLoKg\n \n================================= \n👍Follow facebook chính thức của TOTOLINK Việt Nam để được hỗ trợ, tư vấn, chat chit … ngay nào \nFacebook : https://www.facebook.com/totolinkvietnam \n📩 Email liên hệ hỗ trợ kĩ thuật : [email protected] 📞 Hotline hỗ trợ : 18006078
set access point ภาพบางส่วนในหัวข้อ

5 Best Wireless Access Points – Feb. 2022 – BestReviews Update 2022
Most wireless access points are designed to be set up in one of three locations: Ceiling- and wall-mounted wireless access points are typically the size of a smoke detector, and ideal for covering entire rooms. Keep in mind that wherever you mount your wireless access point, it will need both power and, ideally, a wired internet connection.
Cấu hình VLAN | Cho phép các VLAN truy cập Internet 2022 set access point
ข้อมูลใหม่ในหัวข้อ set access point
#Cisco #Configure_VLANs #IT_Support_People\n\nIn this video I’ve demonstrated step by step process how to configure VLAN and Access internet from VLANs PC using Putty, Cisco 2851 Router and Layer 3 Cisco 3560 switch. I also described how apply IP routing in cisco switch and how to apply static routing and dynamic routing (EIGRP) protocol in both Cisco Switch and router for inter VLAN routing and accessing internet from VLANs PC. Finally, I’ve shown some practical troubleshooting technique for allowing VLANs to internet.\n\nIT Support People Facebook Page: \nhttps://www.facebook.com/IT_Support-PeopleDesktop-Support-111268543923018\n\nLink for Configuring Cisco Router to Access Internet through ISP Home router:\nhttps://www.youtube.com/channel/UCmZZ2BNGXQH1HPS3uIVnr7A?sub_confirmation=1\n\nConfigure Cisco Access Point Standalone/Autonomous using GUI with WPAv2 Authentication Key:\nhttps://www.youtube.com/watch?v=AwuWsGGofT4\u0026t=550s\n\nConfigure Standalone Cisco Access Point from CLI with WPAv2 Authentication:\nhttps://youtu.be/JkUfTXuwj2U\n\nHow to Reset Cisco Access Point to Factory Defaults using Mode Button\nhttps://youtu.be/eGCnTWBEpp8\n\nConnect Cisco Router using PuTTY \u0026 Console Cable | Change Text Color/ Font Size/ Background on PuTTY:\nhttps://www.youtube.com/watch?v=WQeAe8_vbLI\u0026t=43s\n\n\n\n===Putty Command which I’ve loaded for Router Configuration=== \nenable\nconfigure terminal \ninterface gigabitEthernet 0/0\nno shutdown\nip address dhcp\nexit\ninterface gigabitEthernet 0/1\nip address 192.168.2.1 255.255.255.0\nno shutdown\nexit\nip dhcp pool mainuser\nnetwork 192.168.2.0 /24\ndefault-router 192.168.2.1\ndns-server 8.8.8.8\nexit\nip route 0.0.0.0 0.0.0.0 192.168.1.1\ninterface gigabitEthernet 0/0\nip nat outside\nexit\ninterface gigabitEthernet 0/1\nip nat inside\nexit\nip access-list standard 1\npermit any\nexit\nip nat inside source list 1 interface gigabitEthernet 0/0 overload\nexit\n\n——————————————-\nApplying Dynamic Routing EIGRP in Cisco Router:\nrouter eigrp 10\nnetwork 192.168.2.0 255.255.255.0\nexit\n\nPutty commands in Switch:\nenable\nconfigure terminal\nvlan 10\nname hr\nexit\nvlan 20\nname it\nexit\ninterface range fastEthernet 0/13-18\nswitchport mode access\nswitchport access vlan 10\nno shutdown\nexit\ninterface range fastEthernet 0/19-24\nswitchport mode access\nswitchport access vlan 20\nexit\ninterface vlan 10\nip address 192.168.3.1 255.255.255.0\nexit\ninterface vlan 20\nip address 192.168.4.1 255.255.255.0\nexit\n\nApplying Inter VLAN Routing in Cisco Switch:\nconfigure terminal\nip routing\nexit \n\nApplying Static Routing in Cisco Switch :\nip route 0.0.0.0 0.0.0.0 192.168.2.1\nexit\n\nApplying Dynamic Routing EIGRP in Cisco switch:\nconfigure terminal\nrouter eigrp 10\nnetwork 192.168.3.0 255.255.255.0\nnetwork 192.168.4.0 255.255.255.0\nnetwork 192.168.2.0 255.255.255.0\nexit\n\n——————–\nCover Topic: \nConfigure VLAN Allow VLANs to Access Internet,\nConfigure VLAN for internet Access, \nhow to communicate between two different vlans, \nDynamic Routing, EIGRP Routing, CCNA,\ninter vlan routing layer 3 switch,\nvlan cannot access internet,\nvlan no internet access,internet vlan,inter vlan routing,\nCisco Layer 3 switch,vlans not getting internet,\ncreate vlan cisco 3560 switch,\ncreate vlan cisco switch,\nadd port to vlan cisco switch, \nadd interface to vlan,cisco vlan,\ncreating vlans,\nhow to add multiple ports to vlan on cisco switch,\ninter vlan routing configuration,\ncisco putty commands, \nrouting vlans between router and switch,\ninter vlan routing layer 3 switch without router,\nrouting between vlans,\nhow to console into a cisco switch using putty,\nhow to access cisco switch,\nconnect cisco switch to home router,\ncisco home network setup,\nconnect cisco home lab to internet,cisco router configuration,\ncisco internet router,how to install cisco router,\nconfigure cisco switch for home use,\ncisco router to router connection,\nhome network setup diagram, \nbest home network setup 2020,\nhome networking guide,\ncisco router setup,\nhow to connect cisco router to modem,\nhome network setup service,\nconfiguring cisco router for internet access,\nhow to setup a network switch for home networking,\nhome network switch,home network design,\nhow to setup a network switch and router
set access point คุณสามารถดูภาพสวย ๆ ในหัวข้อ

คำสำคัญที่ผู้ใช้ค้นหาเกี่ยวกับหัวข้อ set access point
Tìm kiếm có liên quan cho set access point
จบกระทู้ set access point
Articles compiled by Bangkokbikethailandchallenge.com. See more articles in category: MMO