
You are viewing this post: Top โค้ด arduino led 2022 New
บทความอัพเดทใหม่ในหัวข้อ โค้ด arduino led
Arduino – RGB LED | Arduino Tutorial Update
For RGB LED with common Anode, you need to: Connect the common pin to 3.3V of Arduino. Change R, G and B values in analogWrite () function to 255 – R, 255 – G, and 255 – B, respectively. A sequences of RCB LED connected together creates the RGB LED Strip. LED strip can be categorized in to the addressable LED strip and non-addressable LED Strip.
[Lập trình Arduino cơ bản] Bài 4 – Điều Khiển 8 Led Đơn Với Nhiều Hiệu Ứng Đẹp Mắt New โค้ด arduino led
ข้อมูลเพิ่มเติมเกี่ยวกับหัวข้อ โค้ด arduino led
Bài 4 – Điều Khiển 8 Led Đơn Với Nhiều Hiệu Ứng Đẹp Mắt\n——————————————————————–\nHiệu ứng 1: Điều khiển 8 led nhấp nháy\nHiệu ứng 2: Điều khiển 8 led sáng chạy từ trái qua phải\nHiệu ứng 3: Điều khiển 8 led sáng chạy từ phải qua trái\nHiệu ứng 4: Điều khiển 8 led sáng dồn và tắt dồn từ trái qua phải\nHiệu ứng 5: Điều khiển 8 led sáng dồn và tắt dồn từ phải qua trái\nHiệu ứng 6: Điều khiển 8 led sáng dồn và tắt dồn từ 2 bên vào trong\nHiệu ứng 7: Điều khiển 8 led sáng dồn và tắt dồn từ trong ra 2 bên\nHiệu ứng 8: Điều khển 8 led sáng xen kẽ\n——————————————————————-\n✔️.Xin cám ơn tất cả các bạn đã xem và ủng hộ Kênh. Bất kỳ thắc mắc, đóng góp hoặc Liên Hệ Tài Trợ, Quảng Cáo, Hợp Tác có thể gửi mail qua địa chỉ: [email protected]\n📌.Bạn nào muốn mua Module Arduino hay các thiết bị điện tử thông minh khác thì có thể tham khảo website:\n🌐. http://www.hasonmatic.com\n\n✔️. Bản quyền thuộc về Channel HÀ SƠN MATIC©️\n⛔️. Copyright by HÀ SƠN MATIC©️\n⛔️. Do not Reup\n\n🤠CHÚC CÁC BẠN LUÔN LUÔN HẠNH PHÚC VÀ THÀNH CÔNG🤓
โค้ด arduino led ภาพบางส่วนในหัวข้อ
![โค้ด arduino led Update [Lập trình Arduino cơ bản] Bài 4 - Điều Khiển 8 Led Đơn Với Nhiều Hiệu Ứng Đẹp Mắt](https://i.ytimg.com/vi/-2b0segldIQ/hq720.jpg)
Programming 4 Digit 7 Segment LED Display – Arduino … Update New
18/02/2017 · Displays the numbers 0-9 on the display, with one second in between. This example code is in the public domain. // Pin 2-8 is connected to the 7 segments of the display. (check the numbers besides each pin with the way you connected the wires). // …
+ อ่านข้อมูลเพิ่มเติมได้ที่นี่
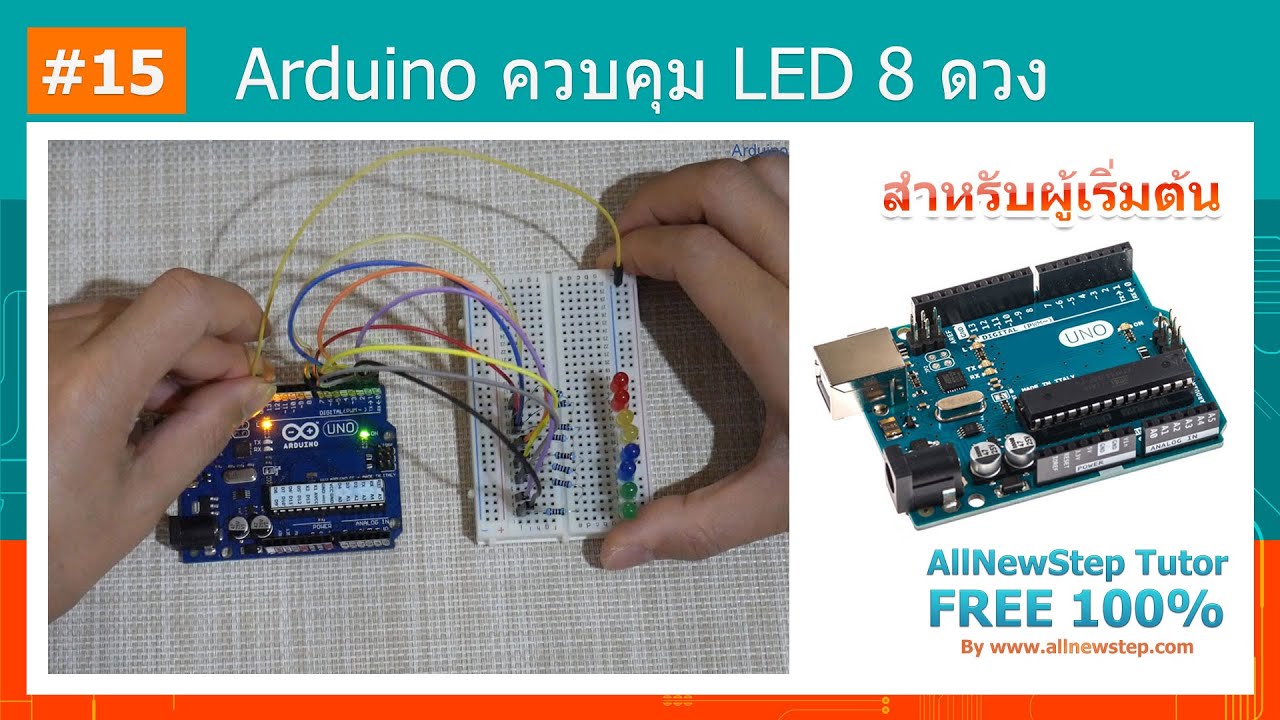
#15 สอน Arduino Tutorial : Arduino GPIO ควบคุม LED 8 ดวง Update 2022 โค้ด arduino led
ข้อมูลเพิ่มเติมเกี่ยวกับหัวข้อ โค้ด arduino led
ในตัวอย่างนี้จะเป็นการฝึกใช้ GPIO ให้มากขึ้น โดยเขียนควบคุม LED 8 ตัว โดยใช้ ตัวแปรแบบ Array และคำสั่งวนลูปช่วยในการให้โคดสั่งลง\n\nดูโคดตัวอย่าง และข้อมูลเพิ่มเติมได้ที่นี่ https://www.allnewstep.com/article/104/15-%E0%B8%AA%E0%B8%AD%E0%B8%99-arduino-tutorial-arduino-gpio-%E0%B8%84%E0%B8%A7%E0%B8%9A%E0%B8%84%E0%B8%B8%E0%B8%A1-led-8-%E0%B8%94%E0%B8%A7%E0%B8%87\nดูคอร์สสอน Arduino ทั้งหมดได้ที่นี่ https://www.allnewstep.com/article/382/%E0%B8%9A%E0%B8%97%E0%B8%84%E0%B8%A7%E0%B8%B2%E0%B8%A1-%E0%B8%AA%E0%B8%AD%E0%B8%99-arduino-%E0%B8%81%E0%B8%B2%E0%B8%A3%E0%B9%83%E0%B8%8A%E0%B9%89%E0%B8%87%E0%B8%B2%E0%B8%99-%E0%B8%AD%E0%B8%B8%E0%B8%9B%E0%B8%81%E0%B8%A3%E0%B8%93%E0%B9%8C-arduino
โค้ด arduino led รูปภาพที่เกี่ยวข้องในหัวข้อ
สอนใช้งาน Arduino สัญญาณ Digital OutPut ควบคุม LED ไฟวิ่ง … Update New
การเขียนโปรแกรมเบื่องต้น สอนใช้งาน Arduino สัญญาณ Digital OutPut ควบคุม LED ไฟวิ่งบทความ arduino นี้จะสอนใช้คำสั่ง digitalWrite(led1,HIGH); ควบคุมการเ…
รู้จัก Auduino UNO และเขียนโค้ดสั่งไฟกระพริบ ง่ายมากๆ 2022 Update โค้ด arduino led
ข้อมูลใหม่ในหัวข้อ โค้ด arduino led
คลิปแยกย่อยแบบระเอียดอยู่ในเพจนะครับ\nArduino ตอนที่ 1 Arduino คืออะไร มีกี่ประเภท https://www.facebook.com/Audomidea/videos/2896356220465403\nArduino ตอนที่ 2 Auduino UNOhttps://www.facebook.com/Audomidea/videos/3288621171226988\nArduino ตอนที่ 3 เชียนโค้ดส่งงานไฟกระพริบ
โค้ด arduino led คุณสามารถดูภาพสวย ๆ ในหัวข้อ

สอนใช้งาน Arduino for สั่งงานให้โปรแกรมวนลูปทำซ้ำ ไฟ LED … 2022 Update
สอนใช้งาน Arduino for สั่งงานให้โปรแกรมวนลูปทำซ้ำ ไฟ LED วิ่งคำสั่ง for เป็นคำสั่งสำหรับสั่งให้โปรแกรมวนรอบทำงานซ้ำ โดยมีการกำหนดค่าเริ่มต้นและ …
BLINKING THE ONBOARD LED – Arduino tutorial #1 2022 New โค้ด arduino led
ข้อมูลใหม่ในหัวข้อ โค้ด arduino led
Learn step-by-step to program the built-in LED with the Arduino IDE. Download code and course material from https://arduino-tutorials.net/tutorial/blinking-led-on-arduino\n\nThe Arduino for beginners tutorials series guides you through the world of Arduino. A video is around 10 minutes and shows you step-by-step how to build the circuit and write the code. The website contains the course material, circuit diagram, Arduino code and shopping list of all the components used in the tutorial. \n\n⬇️ Arduino code, circuit diagram and part list https://arduino-tutorials.net/tutorial/blinking-led-on-arduino\n\n👉 More tutorials and projects on https://arduino-tutorials.net\n\n🇳🇱 Bekijk deze tutorial in het Nederlands op https://youtu.be/meo_OyqEbiM\n\nCHAPTERS:\n00:00 Components needed\n00:12 What is an Arduino?\n00:51 Components on Arduino board\n02:35 The Arduino IDE\n03:30 Blink example\n05:56 Upload sketch to the Arduino\n08:14 Blink sketch running on the Arduino\n\n\nCOMPONENTS\n🇨🇳 Arduino Uno (clone)\nhttps://arduino-tutorials.net/r/KnSgtg\n\n🇳🇱 Arduino Uno (clone)\nhttps://arduino-tutorials.net/r/8237Hd\n\n#arduino #BasOnTech
โค้ด arduino led ภาพบางส่วนในหัวข้อ

#4 สอนใช้งาน Arduino สัญญาณ Digital OutPut ควบคุม LED ไฟ … 2022 Update
ในบอร์ด Arduino Uno มี LED แบบ built-in ติดมาให้ในตัวอยู่แล้ว 1 ตัว อยู่ที่ขา 13 … กำหนด SSID และรหัสผ่าน ของ Wifi โดยไม่ต้องแก้ไขโค้ด (SSID, Password) …
Tự học Arduino bài 2: Điều khiển LED bằng nút nhấn New 2022 โค้ด arduino led
ข้อมูลใหม่ในหัวข้อ โค้ด arduino led
BANLINHKIEN.VN XIN GỬI VIDEO : \” Tự học Arduino bài 2: Điều khiển LED bằng nút nhấn \”.\nĐÂY LÀ KÊNH YOUTUBE CHÍNH THỨC CỦA BLK, ẤN ẤN SUBSCRIBE NGAY NHÉ ĐỂ ỦNG HỘ BÊN MÌNH \n———————————————————————-\nBài trước chúng ta đã đi tìm hiểu về cách xuất dữ liệu số trên Arduino thông qua ví dụ về chớp tắt LED đơn, Hôm nay chúng ta sẽ cùng tìm hiểu về đầu vào số của Arduino thông qua các ví dụ đơn giản là điều khiển LED bằng nút nhấn, giao tiếp nút nhấn. Chuỗi video này sẽ giúp các bạn tự học Arduino 1 cách dễ dàng nhất với bộ KIT học tập Arduino cơ bản.\n☞ Facebook Miền Bắc : https://www.facebook.com/banlinhkienMH/\n☞ Facebook Miền Nam : https://www.facebook.com/banlinhkiennhattao.vn/\n☞ Website : http://banlinhkien.vn\n☞ Link đăng ký để theo dõi nhiều video hơn : https://www.youtube.com/channel/UCSeca92q0ZaRIcLOcsNsQyg?sub_confirmation=1\n———————————————————————-\nBanlinhkien.vn là kênh YOUTUBE của linh kiện điện tử Minh Hà chuyên mua bán linh kiện điện tử. Youtube Banlinhkien.vn hứa hẹn sẽ là cộng đồng điện tử nơi chia sẻ kiến thức, hướng dẫn test sản phẩm, chế đồ điện tử và review, so sánh các sản phẩm công nghệ mới giúp mọi người cập nhập được nhịp đập công nghệ.\nLink bài 1: Tìm hiểu về cách xuất dữ liệu số trên Arduino thông qua ví dụ về chớp tắt LED đơn\nhttps://www.youtube.com/watch?v=rUNlCKcWTPg\u0026t\n- Dưới đây là link mua linh kiện điện tử trong video :\n+ Bộ Kit Học Tập Arduino UNO R3 Cơ Bản giảm giá còn 359k\nhttps://banlinhkien.com/bo-kit-hoc-tap-arduino-uno-r3-co-ban-p8231821.html\n\n———————————————————————-\n- Số điện thoại liên hệ : 1900.03.44\n- Địa chỉ cơ sở để bạn mua Linh Kiện Điện Tử Minh Hà:\n+ Cơ Sở 1 – ĐH Bách Khoa/ Số 84, Đại Cồ Việt, Hà Nội.\n+ Cơ Sở 2 – ĐH Công Nghiệp/ Số 2 ngách 132/86 Nguyên Xá, Đường 32, Từ Liêm, Hà Nội.\n+ Cơ Sở 3 – HVKT Quân Sự/ Số 25 Đặng Thùy Trâm, Cầu Giấy, Hà Nội.\n+ Cơ Sở 4 – Chợ Nhật Tảo/ Số 106/5/ Nguyễn Kim/ P.6/ Q.10/ HCM.\n———————————————————————–\n☞ HÃY ĐỂ LẠI COMMENT ĐÓNG GÓP Ý CHO BÊN MÌNH NHA.
โค้ด arduino led ภาพบางส่วนในหัวข้อ

สอน Arduino – Blinking LED ไฟกระพริบ Update 2022
Blinking LED: เริ่มต้นงานแรกกับการทำไฟ LED กระพริบ ด้วย Arduino เรียนรู้การเขียนโปรแกรมขั้นพื้นฐาน และขาดิจิตอลของตัวบอร์ด
Use Addressable LED Strip with Arduino || Essential Engineering 2022 New โค้ด arduino led
อัพเดทใหม่ในหัวข้อ โค้ด arduino led
Github source code: https://tinyurl.com/yazcha4p\nLEDs used in this video: https://tinyurl.com/y7kqxwqh\n\nThis video covers how to control individually addressable LEDs using an Arduino Nano. LED strips are a fun way to get creative with your Arduino projects, and with a few simple lines of code, you can be up and running in no time! \n\nMake sure you are familiar with for loops, the RGB color scheme, and basic circuitry. The for loop allows you to traverse your array of LEDs and assign each LED a specific RGB color value. Using this logic, you can create motion and flashing effects similar to the video.\n\nLeave questions, suggestions, or feedback in the comments below, and I’ll try to get back to you! \n\n\nABOUT ME: I am a recent graduate from the University of Tennessee Knoxville, and I am on a mission to provide educational and informative content in the realm of engineering. This can range from programming lessons to videos about mechanics of materials, to circuits, and beyond! Most of the lessons I learned in college came not through the classroom, but the time I spent learning things by myself through online communities such as YouTube. I hope to give back to the community by providing valuable content to my viewers. Feel free to subscribe and I promise you’ll learn something new with every video!
โค้ด arduino led คุณสามารถดูภาพสวย ๆ ในหัวข้อ

[Arduino] สร้างวงจรตรวจความเข้มแสง จาก LDR Sensor และใช้ … Update New
16/05/2019 · สารภาพว่านี่ คือ โปรเจคแรกของผมกับ Arduino UNO board โดยก่อนหน้านี้ เล่นบนชุด Kit …
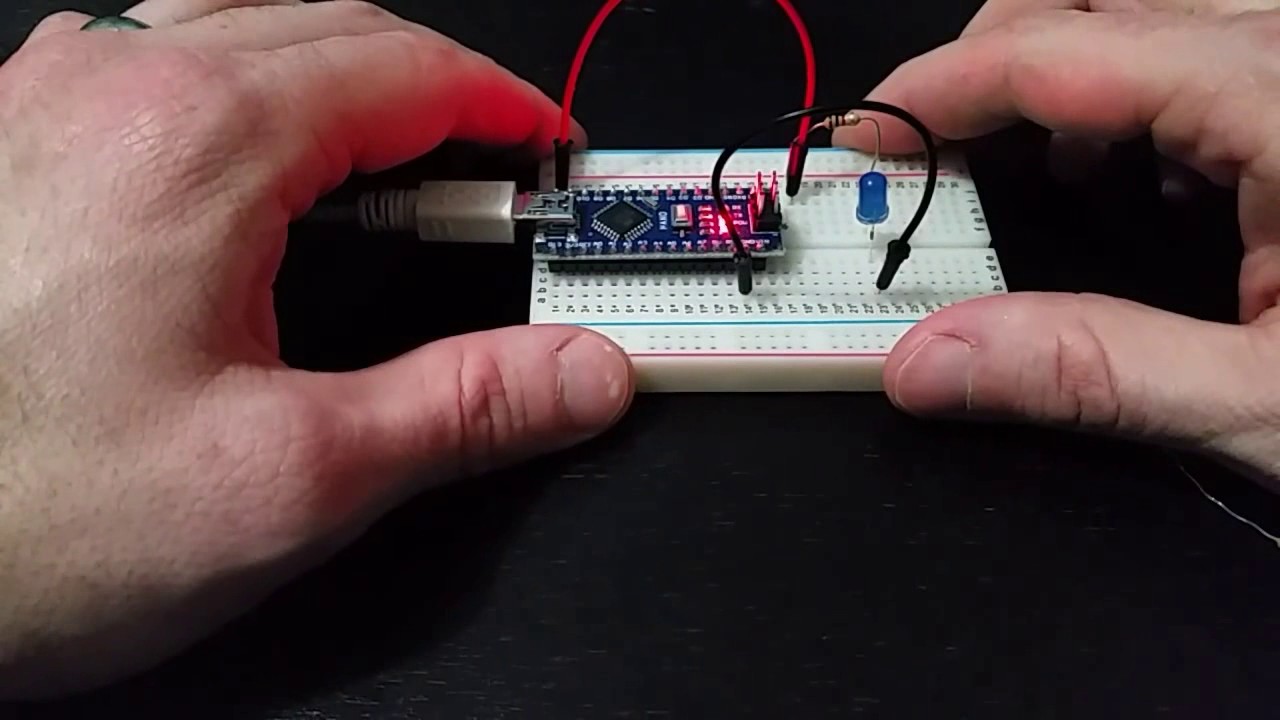
How to Blink an LED with an Arduino Nano New โค้ด arduino led
ดูข้อมูลที่เป็นประโยชน์เพิ่มเติมในหัวข้อ โค้ด arduino led
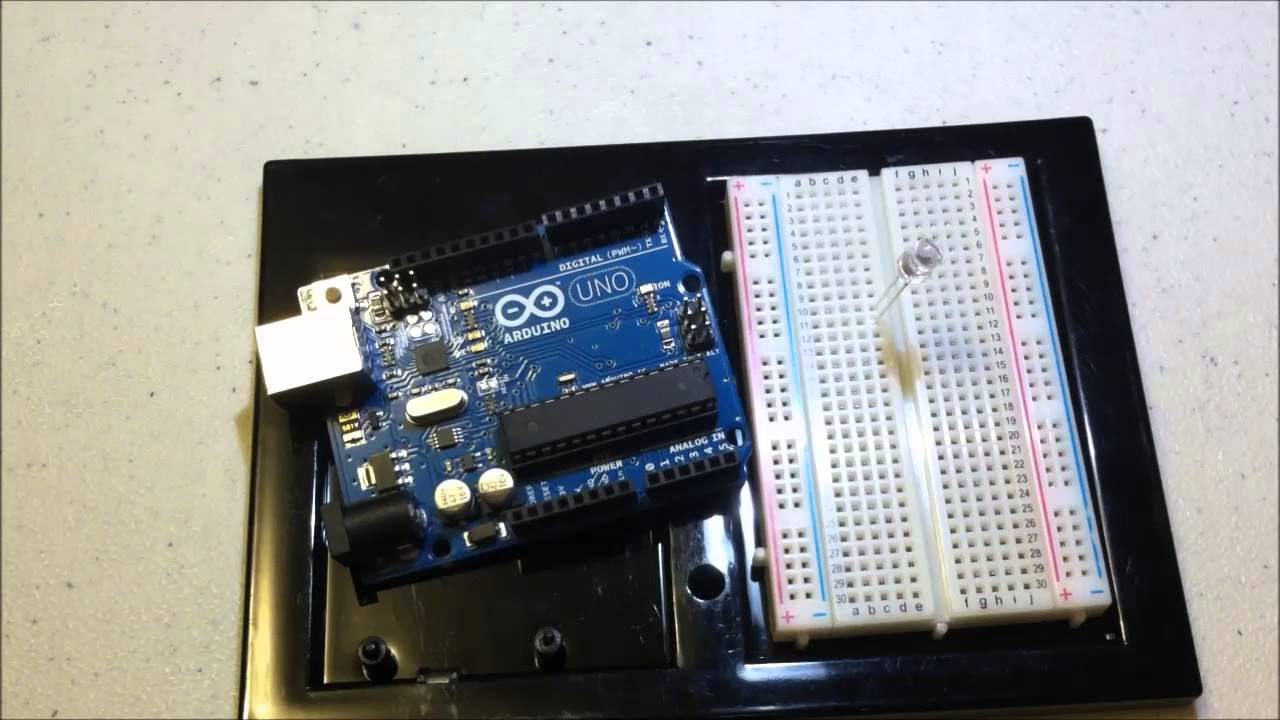
Getting Started with Arduino. In this video I demonstrate how to wire an LED to an Arduino Nano and write the code to make the LED blink. Items used in this video:\n\nArduino Nano (1 for $6): http://amzn.to/2jELVJC\nArduino Nano (5 for $20): http://amzn.to/2kHjus9\nUSB Mini Cable (use your own, or): http://amzn.to/2kg8DrV\n300 LEDs: http://amzn.to/2jrKoDd\n750 Resistors (various value, any one will work): http://amzn.to/2kIK5Jb\nBreadboard with jumper wires: http://amzn.to/2kHnVDb
โค้ด arduino led ภาพบางส่วนในหัวข้อ
เริ่มต้น สอน Arduino : LED Arduino Digital Output – สอน … Update
การสั่งงานให้ไฟ LED เปิดหรือปิดจาก Arduino ก็ทำได้ง่ายมากเช่นกัน เรามาดูกันว่าการทำไฟกระพริบด้วย Arduino จะง่ายแค่ไหน. การเริ่มต้น …
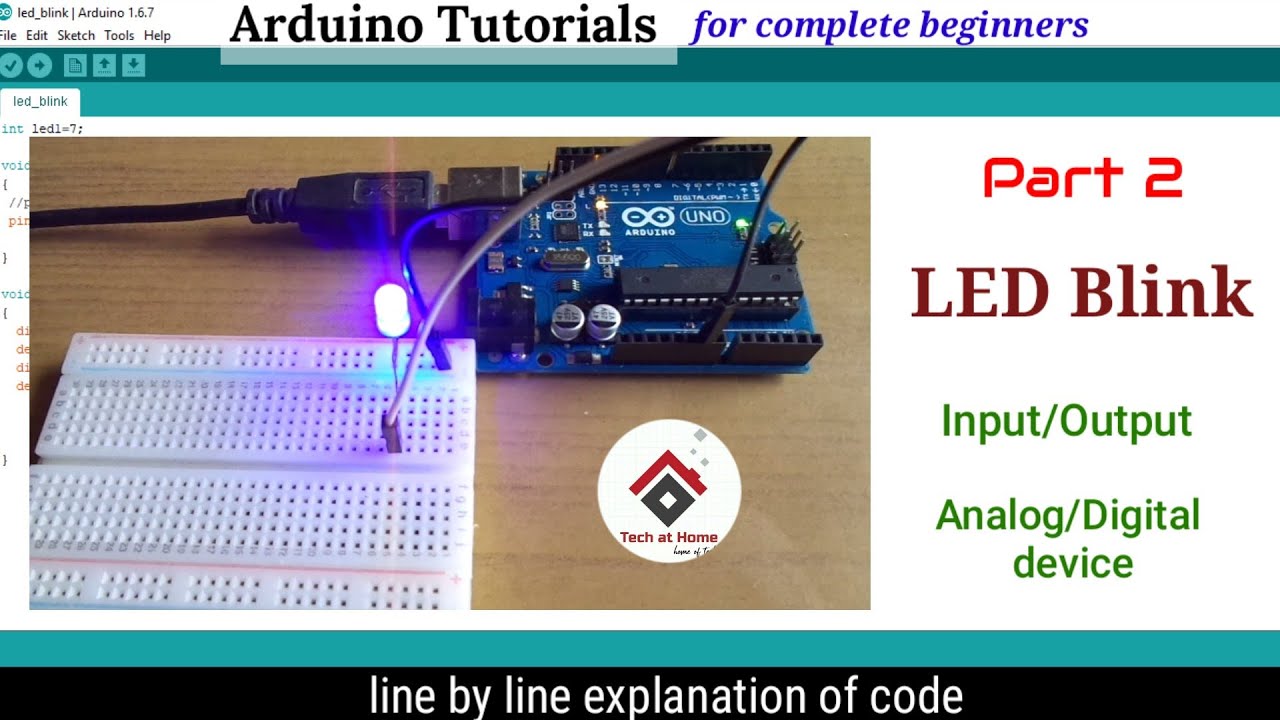
Arduino tutorial 2- LED Blink program with code explained | How to blink an LED using Arduino | 2022 Update โค้ด arduino led
อัพเดทใหม่ในหัวข้อ โค้ด arduino led
Part – 2\n* Input /Output Devices\n* Analog /Digital Devices\n* Explanation of digitalWrite()\n* How to blink a LED\n\nCode \u0026 Circuit :\nhttps://drive.google.com/open?id=1KkPVQUUF04hkuvvmxKWtqDGqJ8H_PnGU\n\nLearn Arduino programimng even without components (Online Arduino Simulator) :\nTutorial video – https://youtu.be/cBmYkaKy0do\n\nFollow us on Instagram :\nhttps://www.instagram.com/tech_at_home/\n\nLike us on Facebook :\nhttps://www.facebook.com/Tech-at-Home-2208852666103605/\n\n#ArduinoTutorials#LEDblink#techathome\nThanks for watching!\n*Like Share and Subscribe*
โค้ด arduino led ภาพบางส่วนในหัวข้อ
ดูข้อมูลหัวข้อเพิ่มเติม โค้ด arduino led
Arduino – RGB LED | Arduino Tutorial New
For RGB LED with common Anode, you need to: Connect the common pin to 3.3V of Arduino. Change R, G and B values in analogWrite () function to 255 – R, 255 – G, and 255 – B, respectively. A sequences of RCB LED connected together creates the RGB LED Strip. LED strip can be categorized in to the addressable LED strip and non-addressable LED Strip.
[Lập trình Arduino cơ bản] Bài 4 – Điều Khiển 8 Led Đơn Với Nhiều Hiệu Ứng Đẹp Mắt New โค้ด arduino led
ข้อมูลเพิ่มเติมเกี่ยวกับหัวข้อ โค้ด arduino led
Bài 4 – Điều Khiển 8 Led Đơn Với Nhiều Hiệu Ứng Đẹp Mắt\n——————————————————————–\nHiệu ứng 1: Điều khiển 8 led nhấp nháy\nHiệu ứng 2: Điều khiển 8 led sáng chạy từ trái qua phải\nHiệu ứng 3: Điều khiển 8 led sáng chạy từ phải qua trái\nHiệu ứng 4: Điều khiển 8 led sáng dồn và tắt dồn từ trái qua phải\nHiệu ứng 5: Điều khiển 8 led sáng dồn và tắt dồn từ phải qua trái\nHiệu ứng 6: Điều khiển 8 led sáng dồn và tắt dồn từ 2 bên vào trong\nHiệu ứng 7: Điều khiển 8 led sáng dồn và tắt dồn từ trong ra 2 bên\nHiệu ứng 8: Điều khển 8 led sáng xen kẽ\n——————————————————————-\n✔️.Xin cám ơn tất cả các bạn đã xem và ủng hộ Kênh. Bất kỳ thắc mắc, đóng góp hoặc Liên Hệ Tài Trợ, Quảng Cáo, Hợp Tác có thể gửi mail qua địa chỉ: [email protected]\n📌.Bạn nào muốn mua Module Arduino hay các thiết bị điện tử thông minh khác thì có thể tham khảo website:\n🌐. http://www.hasonmatic.com\n\n✔️. Bản quyền thuộc về Channel HÀ SƠN MATIC©️\n⛔️. Copyright by HÀ SƠN MATIC©️\n⛔️. Do not Reup\n\n🤠CHÚC CÁC BẠN LUÔN LUÔN HẠNH PHÚC VÀ THÀNH CÔNG🤓
โค้ด arduino led ภาพบางส่วนในหัวข้อ
Programming 4 Digit 7 Segment LED Display – Arduino … ล่าสุด
Displays the numbers 0-9 on the display, with one second in between. This example code is in the public domain. // Pin 2-8 is connected to the 7 segments of the display. (check the numbers besides each pin with the way you connected the wires). // initialize the digital pins as outputs.
Arduino : ตัวหนังสือวิ่ง LED Update 2022 โค้ด arduino led
ข้อมูลใหม่ในหัวข้อ โค้ด arduino led
Arduino : Scrolling LED Text\n\nMax7219 with Wemos D1 (also work with NODEMCU)\n\nCredit Music:\nSong: Elektronomia – Sky High [NCS Release]\nMusic provided by NoCopyrightSounds.\nVideo Link: https://youtu.be/TW9d8vYrVFQ\n\nCode\nhttps://drive.google.com/open?id=1DvfuYhNhkY8e0nopkqqdh2LOk1FxkBeN\n\n\nPhotos\nhttps://photos.google.com/share/AF1QipPnP1Dm_o0Uu4tKRXQuculfv5ELhwfs6B_fuBuTTpyiAGZq6-x1R9ZgqiSzg_PXBQ?key=NmlFdG5haEN3T3k2dXh3ai1ZZEJSMUdaVC13MXJR\n\nRelate:\nhttps://www.youtube.com/watch?v=GOvN4yXKMXM\u0026index=13\u0026list=PLt_jEoGhU21RVJx9J1lOMh48Ius1BXmFU\n\nNotes:\n- after download only one line of code need to be changed incclude d:\\@cloud\\… that my location of file in my machine, find your own path and change it.\n- to connect wifi, connect your mobile phone to board wifi then togo 192.168.3.1 form your phonw, then found config screen, config and save, then retstart board
โค้ด arduino led คุณสามารถดูภาพสวย ๆ ในหัวข้อ

Arduino – LDR With LED : 6 Steps (with Pictures … 2022 New
Step 4: Arduino Connections. The green wire connect to digital 13 from resistor leg. The brown wire connect to GND from LED short leg. The purple wire connect to +5V from LDR. The yellow wire connect to A0. The white wire connect to GND.
+ อ่านข้อมูลเพิ่มเติมได้ที่นี่
How to Blink LED using MATLAB and Arduino 2022 New โค้ด arduino led
ข้อมูลเพิ่มเติมเกี่ยวกับหัวข้อ โค้ด arduino led
In this tutorial, we are going to blink led using matlab and arduino. we will see how to write a code on MATLAB , Interface Arduino with MATALBA and then run LED blinking code. \n\nFor more details Please visit my website \n\nhttp://powersystemlab.com/\n\nHow to inerface Arduino with MATLAB \n\nhttp://powersystemlab.com/how-to-interface-arduino-with-matlab
โค้ด arduino led ภาพบางส่วนในหัวข้อ
Arduino – Blinking LED – Tutorialspoint Update
Arduino – Blinking LED. LEDs are small, powerful lights that are used in many different applications. To start, we will work on blinking an LED, the Hello World of microcontrollers. It is as simple as turning a light on and off.
Arduino Tutorial – LED Blink / Code Included New โค้ด arduino led
ดูข้อมูลที่เป็นประโยชน์เพิ่มเติมในหัวข้อ โค้ด arduino led
Tutorial on making LEDs blink using Arduino microcontroller platform. Any resistor between 220 and 1000 Ohms should work fine. Very easy demo for beginners. Link to code below. Look out for more videos to come!\n\nLink to code:\nhttps://github.com/hoilett/Arduino-Blink-YouTube-Tutorial\n\nLink to a folder with other codes:\nhttps://github.com/hoilett?tab=repositories
โค้ด arduino led ภาพบางส่วนในหัวข้อ
#4 สอนใช้งาน Arduino สัญญาณ Digital OutPut ควบคุม LED ไฟ … New Update
ในบอร์ด Arduino Uno มี LED แบบ built-in ติดมาให้ในตัวอยู่แล้ว 1 ตัว อยู่ที่ขา 13 … กำหนด SSID และรหัสผ่าน ของ Wifi โดยไม่ต้องแก้ไขโค้ด (SSID, Password) …
How to use 5V Relay with Arduino to turn ON and OFF AC bulb or DC load Update 2022 โค้ด arduino led
ข้อมูลเพิ่มเติมเกี่ยวกับหัวข้อ โค้ด arduino led
In this video you will get learn how to control an AC bulb or load or DC load using 5V relay. \nCode is provided and controlling AC bulb is demonstrated.\nThis video is part of Arduino Step by Step course bey Robojax which starts here https://youtu.be/-6qSrDUA5a8\n\nSubscribe To my channel now http://bit.ly/rj-subscribe\n\n***** Purchase 5V High level Trigger Relay from ***\nAmazon USA: https://amzn.to/3DIrBwv\nAmazon Canada: https://amzn.to/31Oxtaf\nAll other Amazon: https://amzn.to/3DJUj03\neBay: https://ebay.us/mFV5Pu\nAliExpress: https://s.click.aliexpress.com/e/_9fgPY8\nBanggood: https://www.banggood.com/custlink/DGvYsdTuBK\n\n*** Purchase Arduino Start Kit ***\nAmazon USA: https://amzn.to/3z88F9G or just UNO board https://amzn.to/3aY7KOL\nAmazon Canada: https://amzn.to/31an88J or just UNO board https://amzn.to/3pYxSNN\nAmazon Europe (all Europe): or Just uno board https://amzn.to/2PgGItD\nAliExpress: https://s.click.aliexpress.com/e/_9uc7Xe\nBanggood: https://www.banggood.com/custlink/3GDdsC1slt or UNO board https://www.banggood.com/custlink/vKmdbc7blp\neBay: https://ebay.us/B1JWLi\n\n****** Purchase Authentic Arduino Uno from Affiliated Store **** \nAmazon USA: https://amzn.to/2KApAwK\nAmazon Canada: https://amzn.to/37LZ8sW\nAmazon Europe (all Europe): https://amzn.to/3bKOMug\n\n*** Purchase Arduino Uno Compatible from Affiliated Store\nAmazon USA: https://amzn.to/3aY7KOL\nAmazon Canada: https://amzn.to/3pYxSNN\nAmazon Europe (all Europe): https://amzn.to/2PgGItD\n\n**** Free Course ****\nArduino Step by Step Course (over 100 lectures) Starts here https://youtu.be/-6qSrDUA5a8\n\nThe best thank you for me is to not skip ads and Subscribe 🔔 to my channel, like 👍 the video and do not skip the ads.. It is greatly appreciated. 🔔 😊. \nI will reply to all Subscriber’s 🔔 questions. So make sure to Subscribe.😊 .\n\n\nDownload the code from: http://robojax.com/L/?id=223\n\n00:00 Relay explained\n03:33 Wiring explained\n04:42 Code explained\n06:10 Demonstration\n\n\n\nRelated videos:\nIf you need to control bulb with push button: https://youtu.be/7CCSRs5bvH0\n4 channel relay: https://youtu.be/3EZecphNdAI\n8 channel relay: https://youtu.be/dkESWpdDBYk\n16 channel relay : https://youtu.be/Q9aBI4ELKC4\nIf you have the other 5V relay modules with Green and Red LED, then watch this video: https://youtu.be/g6k8sPJyif8\nRelay with Push button ON, and Push OFF: https://youtu.be/7CCSRs5bvH0\nWatch my video on dual relay 999 minuets timer\nhttps://youtu.be/O01NCZq7O2M\nTurn ON and OFF AC bulb with Arduino and your mobile phone:\nhttps://youTu.be/-E9J9ExdZ20\nUsing 4 Push button push-ON and push-OFF 4 relays with Arduino:\nhttps://youTu.be/3EZecphNdAI\nHow to use a breadboard : http://robojax.com/L/?id=121\n\nJump to different Chapters of this video:\n00:00 Start\n00:01 Relay Explained\n03:33 Wiring Explained\n04:43 Arduino Code Explained\n06;20 Demonstration\n\n\nTutorial by Ahmad Shamshiri form Canada\n****************************\nArduino Step by Step Course (over 100 lectures) Starts here https://youtu.be/-6qSrDUA5a8\n****************************\nIf you found this tutorial helpful, please support me so I can continue creating contents like this. Here is PayPal link https://paypal.me/robojaxTV\n\n\nFollow me on Facebook http://fb.me/robojaxTV\nFollow me on Twitter: https://twitter.com/robojaxTV\nFollow me on Instagram: https://instagram.com/robojax/\n\nTutorial by Robojax.com\nGet other projects code and learn Arduino\n http://robojax.com/learn/arduino\n#robojax #robojaxRelay #robojaxArduinoCourse
โค้ด arduino led รูปภาพที่เกี่ยวข้องในหัวข้อ

Arduino ไฟวิ่งฝนดาวตก – 123 microcontroller Update
มาเริ่มกันเลยดีกว่า ที่บอร์ด Arduino จะมีขา digital out ที่เป็น PWM ให้เรา 6 pin ครับ ไ้ด้แก่ PIN 11,10,9,6,5,3 ดูจากรูปด้านล่าง เราก็เอาหลอด LED ต่อที่ขาดังกล่าวเลยครับ โดย …
Basic LED Matrix with Arduino New โค้ด arduino led
ข้อมูลเพิ่มเติมเกี่ยวกับหัวข้อ โค้ด arduino led
Very basic how to start controlling LEDs using row \u0026 column addressing. I.E. How to start if you want to make an LED display [or anything else interesting] and don’t know much [or anything] about electronics.\r\n\r\n\r\nThis tutorial is the result of me trying to make an LED matrix display using the Arudino system in a short period of time and starting from a point of no prior electronics experience. One of the reasons it was so hard for me to try my project was not how difficult the task was but how little support there was for people in my position.\r\n\r\nAim of the tutorial\r\n\r\n. Give understanding of how row and column addressing can be used to light individual LEDs on a matrix\r\n. Demonstrate the very core basic level code that is needed to perform this function\r\n. To show how this can be used to start creating interesting things.\r\n\r\nthe code ~\r\n\r\nint colPin1 = 8;\r\nint colPin2 = 9;\r\nint rowPin1 = 1;\r\nint rowPin2 = 2;\r\nint rowPin3 = 3;\r\nint rowPin4 = 4;\r\nint rowPin5 = 5;\r\n\r\nvoid setup() {\r\npinMode(colPin1, OUTPUT);\r\npinMode(colPin2, OUTPUT);\r\npinMode(rowPin1, OUTPUT);\r\npinMode(rowPin2, OUTPUT);\r\npinMode(rowPin3, OUTPUT);\r\npinMode(rowPin4, OUTPUT);\r\npinMode(rowPin5, OUTPUT);\r\n}\r\n\r\nvoid loop()\r\n{\r\ndigitalWrite(colPin1, HIGH);\r\ndigitalWrite(colPin2, LOW);\r\ndigitalWrite(rowPin1, LOW);\r\ndigitalWrite(rowPin2, LOW);\r\ndigitalWrite(rowPin3, HIGH);\r\ndigitalWrite(rowPin4, LOW);\r\ndigitalWrite(rowPin5, LOW); \r\n}\r\n\r\n***I am not an expert and am aware that this code should be tidier. I kept this simple to make clear the way in which it performs the task. It would be great if people could respond with the next step, which is how to take this code and add layers on it to make it more efficient and more powerful***
โค้ด arduino led รูปภาพที่เกี่ยวข้องในหัวข้อ

[Arduino] สร้างวงจรตรวจความเข้มแสง จาก LDR Sensor และใช้ … New
16/05/2019 · สารภาพว่านี่ คือ โปรเจคแรกของผมกับ Arduino UNO board โดยก่อนหน้านี้ เล่นบนชุด Kit …
How to Upload and Run Code on an Arduino Board – Getting Started with Arduino 2022 New โค้ด arduino led
ข้อมูลใหม่ในหัวข้อ โค้ด arduino led
In this video, we go over all the necessary materials and steps you need to get started with working on your Arduino. These steps involve downloading and installing the Arduino IDE, Arduino software, and Arduino drivers, and uploading a simple program onto the Arduino board.\n\n*****IMPORTANT LINKS*****\nArduino IDE Download page: https://www.arduino.cc/en/Guide\nMore info about the Boards Manager: https://support.arduino.cc/hc/en-us/articles/360016119519-How-to-add-boards-in-the-board-manager\nHow to manually install software drivers on Windows: https://www.arduino.cc/en/Guide/DriverInstallation\nMore info on the Blink sketch: https://www.arduino.cc/en/Tutorial/BuiltInExamples/Blink\nMaterials used in this video:\nArduino Uno (but any board will do): https://www.amazon.com/dp/B008GRTSV6\nArduino Uno cable (different boards may require different cables): https://www.amazon.com/dp/B009GUVZOK/\nAny computer will work for this video\n\nHow to support the channel:\nGet a shirt or sweatshirt with free shipping (Use code \”SHIP\” at checkout): https://teespring.com/stores/flopperam\nBecome a member: https://www.youtube.com/channel/UCO77KLKwplncMHLo6gLpIHw/join\nSupport us on Patreon: https://www.patreon.com/flopperam\nDonate to our PayPal: https://www.paypal.me/flopperam\nSponsor us on Github: https://github.com/sponsors/chris-gong\n\nSocial media links:\nDiscord: https://discord.gg/8yvTRBv\nTwitter: https://twitter.com/Flopperam\nInstagram: https://www.instagram.com/flopperam/\nFacebook: https://www.facebook.com/flopperam\n\nMusic Creds:\nSong: LAKEY INSPIRED – Chill Day (Vlog No Copyright Music)\nMusic provided by Vlog No Copyright Music.\nVideo Link: https://youtu.be/vtHGESuQ22s\n\nSong: LAKEY INSPIRED – Doing Just Fine\nVideo Link: https://www.youtube.com/watch?v=rft-wpNtt-w\nYoutube Channel Link: https://www.youtube.com/channel/UCOmy8wuTpC95lefU5d1dt2Q\n\n0:00 Materials needed\n1:21 Arduino IDE software\n2:48 Running a blink program\n6:18 Cleaning up\n\n#arduino
โค้ด arduino led คุณสามารถดูภาพสวย ๆ ในหัวข้อ

สอนการใช้งานบอร์ด Arduino กับเซนเซอร์ DHT วัดความชื้นและ … 2022 New
สอนการใช้งานบอร์ด Arduino กับเซนเซอร์ DHT วัดความชื้นและอุณหภูมิ พร้อมโค้ดตัวอย่าง … หน้าจอ LCD/LED/OLED [71] LED/LCD Display [36] OLED Display [14] Nextion [5] Dot matrix [11]
Tự học 8051: Bai5 – Hướng dẫn lập trình LED trái tim – Rất dễ làm New Update โค้ด arduino led
อัพเดทใหม่ในหัวข้อ โค้ด arduino led
Link website linh kiện và tài liệu hướng dẫn https://dientu360.com (hotline 0868.306.306)\n\nMô phỏng led trái tim với 8051 \u0026 proteus\nDownload Source Code và file PCB Altium tại\nhttps://www.youtube.com/channel/UCnl-vWPlkNItqx-u19uEWWQ?sub_confirmation=1\n http://dientu360.com/hop-qua-led-trai-tim
โค้ด arduino led คุณสามารถดูภาพสวย ๆ ในหัวข้อ

สอน Arduino – Digital Input ปุ่ม Button New Update
มาลองทำวงจร Arduino ง่ายๆแต่ได้ความรู้ คือวงจรที่มีทั้ง Input และ Output แบบ Digital โดยเราจะทำวงจรที่ใช้ Input Pin ของ Arduino มารับค่าการกดปุ่ม แล้วนำค่านั้นไปควบคุม LED …
Basic Arduino EP1 ควบคุมการเปิด-ปิด LED New โค้ด arduino led
ข้อมูลใหม่ในหัวข้อ โค้ด arduino led
*** การต่อใช้งาน LED ควรตรวจสอบขา Anode(A) และขา Cathode(K) เพื่อป้องการความเสียหาย โดยขา A จะต่อกับขั้วบวก (+) ขา K จะต่อกับ (GND)\n\nการต่อใช้งาน LED \nhttps://bit.ly/2vNiUE7\n\nCode\nhttps://bit.ly/2PU6i54\n\nTinkercad URL\nhttps://www.tinkercad.com/things/bhnM5F3vWd8
โค้ด arduino led ภาพบางส่วนในหัวข้อ

ใบงานที่.2 7 segment เลข 0-9 – Blogger Update
21/03/2018 · หมายเหตุ. การเขียนโปรแกรมเพื่อให้แสดงผลออกหลอดแสดงผล LED 7-Segment แสดงตัวเลข 9-0 นอกจากจะแก้ไขส่วนของฟังก์ชัน for ดังตัวอย่างที่ 3.2 …
+ อ่านข้อมูลเพิ่มเติมได้ที่นี่
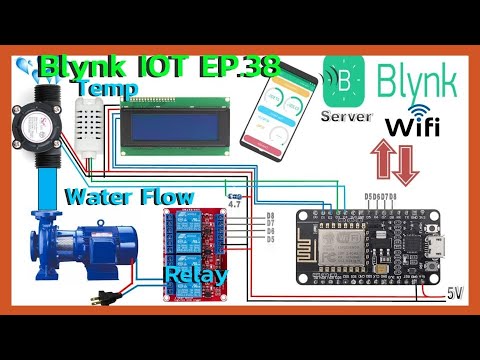
Blynk IOT EP.38 Flow Sensor Temperature ควบคุม Relay LCD ในการควบระบบไฟฟ้าภายในบ้าน #DIY 2022 New โค้ด arduino led
ข้อมูลเพิ่มเติมเกี่ยวกับหัวข้อ โค้ด arduino led
#คลิปสอนใช้งาน Blynk App\nhttps://www.youtube.com/watch?v=08j_8cxNWBk\u0026list=PLuy12Qg1_q83TMVrDepWSPOHxMvBjvUuB\u0026index=1\n\n#การลงไดรเวอร์_ESP32/ESP8266\nhttps://www.youtube.com/watch?v=_DkED6h2Dis\u0026t=1s\n\n#การลงไลบร้ารี่\nhttps://www.youtube.com/watch?v=lT2-vMApiBA\n\n มีข้อสงสัยตรงไหนสามารถทักมาพูดคุยกันได้เสมอครับ ยินดีให้คำปรึกษาเรื่องโปรเจคต่างๆ(ไม่มีค่าใช้จ่ายใดๆ) อยากให้ทำคลิปเกี่ยวกับอะไร เเสดงความคิดเห็นได้เลยนะครับ\n\n#ร่วมสนับสนุนทำคลิปสอนได้ทาง 💸\n#พร้อมเพย์ 0912323945 \n\n#สงสัยเรื่องโปรเเกรมทักมาคุยกันได้เสมอครับ\n#เพจ_https://www.facebook.com/Projects.Creative\nhttps://web.facebook.com/wasan.show\n#https://www.instagram.com/wasan_show/\n#line_ID: easyeasily\n#Code_ตัวอย่างโปรเเกรม
โค้ด arduino led รูปภาพที่เกี่ยวข้องในหัวข้อ
ค้นหาที่เกี่ยวข้องกับหัวข้อ โค้ด arduino led
Đang cập nhật
ขอบคุณที่รับชมกระทู้ครับ โค้ด arduino led
Articles compiled by Bangkokbikethailandchallenge.com. See more articles in category: MMO