
You are viewing this post: Top led arduino New 2022
บทความอัพเดทใหม่ในหัวข้อ led arduino
Make a Simple LED Circuit – Arduino Project Hub New Update
09/03/2018 · LED emergency lights for use on model / toy vehicles and other projects. Uses Arduino UNO and GY-WS2812B-8 RGB LED Module from DIYmall.
Tự học Arduino bài 2: Điều khiển LED bằng nút nhấn New led arduino
ข้อมูลใหม่ในหัวข้อ led arduino
BANLINHKIEN.VN XIN GỬI VIDEO : \” Tự học Arduino bài 2: Điều khiển LED bằng nút nhấn \”.\nĐÂY LÀ KÊNH YOUTUBE CHÍNH THỨC CỦA BLK, ẤN ẤN SUBSCRIBE NGAY NHÉ ĐỂ ỦNG HỘ BÊN MÌNH \n———————————————————————-\nBài trước chúng ta đã đi tìm hiểu về cách xuất dữ liệu số trên Arduino thông qua ví dụ về chớp tắt LED đơn, Hôm nay chúng ta sẽ cùng tìm hiểu về đầu vào số của Arduino thông qua các ví dụ đơn giản là điều khiển LED bằng nút nhấn, giao tiếp nút nhấn. Chuỗi video này sẽ giúp các bạn tự học Arduino 1 cách dễ dàng nhất với bộ KIT học tập Arduino cơ bản.\n☞ Facebook Miền Bắc : https://www.facebook.com/banlinhkienMH/\n☞ Facebook Miền Nam : https://www.facebook.com/banlinhkiennhattao.vn/\n☞ Website : http://banlinhkien.vn\n☞ Link đăng ký để theo dõi nhiều video hơn : https://www.youtube.com/channel/UCSeca92q0ZaRIcLOcsNsQyg?sub_confirmation=1\n———————————————————————-\nBanlinhkien.vn là kênh YOUTUBE của linh kiện điện tử Minh Hà chuyên mua bán linh kiện điện tử. Youtube Banlinhkien.vn hứa hẹn sẽ là cộng đồng điện tử nơi chia sẻ kiến thức, hướng dẫn test sản phẩm, chế đồ điện tử và review, so sánh các sản phẩm công nghệ mới giúp mọi người cập nhập được nhịp đập công nghệ.\nLink bài 1: Tìm hiểu về cách xuất dữ liệu số trên Arduino thông qua ví dụ về chớp tắt LED đơn\nhttps://www.youtube.com/watch?v=rUNlCKcWTPg\u0026t\n- Dưới đây là link mua linh kiện điện tử trong video :\n+ Bộ Kit Học Tập Arduino UNO R3 Cơ Bản giảm giá còn 359k\nhttps://banlinhkien.com/bo-kit-hoc-tap-arduino-uno-r3-co-ban-p8231821.html\n\n———————————————————————-\n- Số điện thoại liên hệ : 1900.03.44\n- Địa chỉ cơ sở để bạn mua Linh Kiện Điện Tử Minh Hà:\n+ Cơ Sở 1 – ĐH Bách Khoa/ Số 84, Đại Cồ Việt, Hà Nội.\n+ Cơ Sở 2 – ĐH Công Nghiệp/ Số 2 ngách 132/86 Nguyên Xá, Đường 32, Từ Liêm, Hà Nội.\n+ Cơ Sở 3 – HVKT Quân Sự/ Số 25 Đặng Thùy Trâm, Cầu Giấy, Hà Nội.\n+ Cơ Sở 4 – Chợ Nhật Tảo/ Số 106/5/ Nguyễn Kim/ P.6/ Q.10/ HCM.\n———————————————————————–\n☞ HÃY ĐỂ LẠI COMMENT ĐÓNG GÓP Ý CHO BÊN MÌNH NHA.
led arduino ภาพบางส่วนในหัวข้อ

Arduino LED – Complete Tutorial – The Robotics Back-End New Update
Going further with Arduino and LEDs. In this Arduino LED tutorial you’ve seen how to create a circuit with a LED, and how to write code to control it. As you’ve seen, even if we keep the examples at a basic level, there are quite a few things you can do with LEDs. The amount of applications where you will use LEDs is endless.
[Lập trình Arduino cơ bản] Bài 4 – Điều Khiển 8 Led Đơn Với Nhiều Hiệu Ứng Đẹp Mắt 2022 Update led arduino
ข้อมูลเพิ่มเติมเกี่ยวกับหัวข้อ led arduino
Bài 4 – Điều Khiển 8 Led Đơn Với Nhiều Hiệu Ứng Đẹp Mắt\n——————————————————————–\nHiệu ứng 1: Điều khiển 8 led nhấp nháy\nHiệu ứng 2: Điều khiển 8 led sáng chạy từ trái qua phải\nHiệu ứng 3: Điều khiển 8 led sáng chạy từ phải qua trái\nHiệu ứng 4: Điều khiển 8 led sáng dồn và tắt dồn từ trái qua phải\nHiệu ứng 5: Điều khiển 8 led sáng dồn và tắt dồn từ phải qua trái\nHiệu ứng 6: Điều khiển 8 led sáng dồn và tắt dồn từ 2 bên vào trong\nHiệu ứng 7: Điều khiển 8 led sáng dồn và tắt dồn từ trong ra 2 bên\nHiệu ứng 8: Điều khển 8 led sáng xen kẽ\n——————————————————————-\n✔️.Xin cám ơn tất cả các bạn đã xem và ủng hộ Kênh. Bất kỳ thắc mắc, đóng góp hoặc Liên Hệ Tài Trợ, Quảng Cáo, Hợp Tác có thể gửi mail qua địa chỉ: [email protected]\n📌.Bạn nào muốn mua Module Arduino hay các thiết bị điện tử thông minh khác thì có thể tham khảo website:\n🌐. http://www.hasonmatic.com\n\n✔️. Bản quyền thuộc về Channel HÀ SƠN MATIC©️\n⛔️. Copyright by HÀ SƠN MATIC©️\n⛔️. Do not Reup\n\n🤠CHÚC CÁC BẠN LUÔN LUÔN HẠNH PHÚC VÀ THÀNH CÔNG🤓
led arduino รูปภาพที่เกี่ยวข้องในหัวข้อ
![led arduino Update [Lập trình Arduino cơ bản] Bài 4 - Điều Khiển 8 Led Đơn Với Nhiều Hiệu Ứng Đẹp Mắt](https://i.ytimg.com/vi/-2b0segldIQ/hq720.jpg)
Đèn LED | Cộng đồng Arduino Việt Nam 2022
3. LED dán (SMD) Loại LED này có thể hơi lạ với các bạn, nhưng đừng lo lắng, bạn có thể ý những con LED cực kì nhỏ trong mạch Arduino của bạn không, …
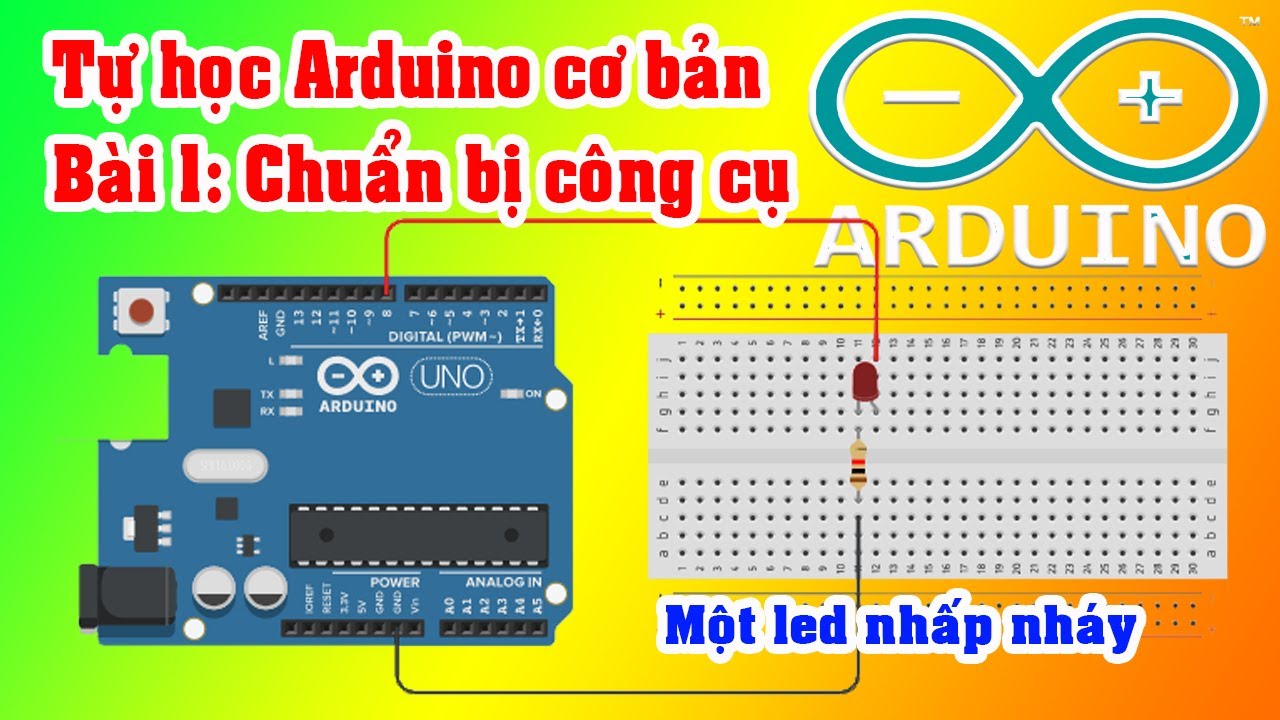
Bài 1: Cài đặt Arduino, viết chương trình làm đèn led nhấp nháy theo yêu cầu | Tự học Arduino cơ bản New led arduino
อัพเดทใหม่ในหัวข้อ led arduino
Đây là loạt video về Arduino cơ bản với đầy đủ các bài học cơ bản với led, cảm biến và các ứng dụng thực tế.\nMình không phải dân chuyên, tất cả là do mình tự học và muốn chia sẽ với các bạn có niềm đam mê như mình, nên video mình làm ra có thể có sai sót mong các bạn thông cảm và đóng góp thêm.\nMọi đóng góp ý kiến của các bạn là động lực để mình hoàn thiện hơn các video clip sau.\nChọn bộ các bài học https://www.youtube.com/playlist?list=PLe-j2rpPeZ3_cm6OO5gPwJsC_MHioLmkI\nLink tải phần mềm Arduino: http://www.mediafire.com/file/6h2cpv2twd3o6qi/arduino-nightly-windows.zip/file\nLink code: http://www.mediafire.com/file/8c8v4gdcgc09rpb/fantabulous_waasa1.ino/file\nLink file giảng có bài tập: https://www.mediafire.com/file/00zrkb54j39sf01/BAI_1.pptx/file\n=======================================================================\nTruy cập trang Blog để xem nhiều hơn: https://thanhtukgc.blogspot.com\nFacebook: https://www.facebook.com/thanhtu.khanhnhoc\nLiên hệ làm mô hình, đồ án nhỏ: [email protected] .\n#Arduino #arduinocoban #laptrinharduino #thanhtuvlogs
led arduino ภาพบางส่วนในหัวข้อ
Arduino – Blinking LED – Tutorialspoint ล่าสุด
Đang cập nhật
8x8x8 LED CUBE WITH ARDUINO UNO 2022 Update led arduino
ดูข้อมูลที่เป็นประโยชน์เพิ่มเติมในหัวข้อ led arduino
Source code and schematic can be found on my GitHub\nhttps://github.com/itsharryle/LED_CUBE\n\nPART LIST:\n5mm diffused blue LEDs x 512\n20 AWG tinned copper wire\n5V 10A regulated switching power supply\nRibbon cables\nPN2222 transistors x 16\n220 ohm resistors x 64\n74HC595 shift registers x 9\nArduino Uno R3\n\nSolder\nSoldering iron\nPrototyping board\nWires\nButtons\nRed LED\nGreen LED\n\nWooden board\nWood glue\nClamps\nSpray paint\nFoam boards
led arduino ภาพบางส่วนในหัวข้อ

Arduino – LED – Blink | Arduino Tutorial Update 2022
Connect Arduino to PC via USB cable. Open Arduino IDE, select the right board and port. On Arduino IDE, Go to File Examples 01.Basics Blink example. . /* Blink Turns an LED on for one second, then off for one second, repeatedly. Most Arduinos have an on-board LED you can control. On the UNO, MEGA and ZERO it is attached to digital pin 13, on …
[Arduino basic #2] Đèn LED và breadboard New 2022 led arduino
ดูข้อมูลที่เป็นประโยชน์เพิ่มเติมในหัวข้อ led arduino
Nội dung:\n#1. Giới thiệu – Cài đặt và chạy chương trình Arduino đầu tiên\nhttps://youtu.be/NgbRRJyQBeI\n#2. Đèn LED và breadboard\nhttps://youtu.be/sVzANWqtgwY\n#3. Sử dụng biến dữ liệu\nhttps://youtu.be/lL6I-Ikz58o\n#4. Số nhị phân – Bộ đếm số nhị phân 4 bit với 4 đèn LED\nhttps://youtu.be/T59A7FGRmgU\n#5. Tạo xung PWM điều khiển độ sáng đèn LED\nhttps://youtu.be/0L9dBpUrO7Y\n#6. Đọc giá trị điện áp (analogRead) và in ra màn hình Serial\nhttps://youtu.be/kLSVl49-fis\n#7. Biến trở\nhttps://youtu.be/4alQWkfInc0\n#8. Cấu trúc điều kiện If … else\nhttps://youtu.be/l5H8d_iqNUo\n#9. Vòng lặp for\nhttps://youtu.be/KLSfVvOYlXA\n#10. Vòng lặp while\nhttps://youtu.be/e8HRI-a5_FA\n#11. Đọc giá trị từ serial monitor\nhttps://youtu.be/s0xxIU2y4k8\n#12. Đọc chuỗi ký tự từ cổng serial monitor\nhttps://youtu.be/vGfLHhslUz0
led arduino คุณสามารถดูภาพสวย ๆ ในหัวข้อ
![led arduino 2022 [Arduino basic #2] Đèn LED và breadboard](https://i.ytimg.com/vi/sVzANWqtgwY/hq720.jpg)
led | Cộng đồng Arduino Việt Nam ล่าสุด
về NRA – Phần 1: Bật tắt led đơn giản trên Web. Bình luận. 14198 lượt xem. Lâu rồi mới có thời gian nghịch với Raspi và Arduino. Hôm nay mình sẽ giới thiệu các bạn những sức mạnh của sự kết hợp giữa Nodejs (N), Raspberry Pi (R), Arduino (A). Ở đây các bạn sẽ điều khiển …
Hướng dẫn Arduino: Điều khiển tuần tự LED- Dự án dành cho người mới bắt đầu Update 2022 led arduino
ข้อมูลเพิ่มเติมเกี่ยวกับหัวข้อ led arduino
Arduino Tutorial: LED Sequential Control- Beginner Project\nInexpensive Arduino Starter Kit: http://amzn.to/1CqGEuB\n\nLink to Arduino IDE: https://www.arduino.cc/en/Main/Software\n\nLink to Sketch for this project: https://www.dropbox.com/s/bivwdnehp7ln1iq/Sequential_blinking.ino?dl=0\n\nToday I am going to show you guys a very simple arduino project for beginners. We’re going to get three different LEDs to turn on and turn off in a simple sequence, like you see here.\n\nFor this, you’re going to need an Arduino Uno or similar Arduino board, a breadboard (preferably with a positive and negative rail like this one), four breadboard jumper wires, a USB cable to for the Uno, three LEDs of different colors(here we are using Blue, Red and Green) and 3 220ohm resistors. Now we’re using 220ohm resistors, because they seem to work best with the LEDs we have- but you could use different resistors, depending on your LEDs and your circuit. I’ve put a link to an inexpensive arduino kit that contains all these components in the description below, in case you’re looking to get an arduino uno and all the basic components for this tutorial. \n\nSo lets first setup the hardware. The first step is to establish a common ground. To do this, use a jumper wire to connect the Ground pin on the arduino to the negative rail on the breadboard. This allows all the LEDs to use the ground pin on the arduino. Now we’ll insert the resistors into the breadboard. Space the resistors out with one leg connected to the the negative rail. Now its time to insert the LEDs. Before inserting the LEDs, its important to note that the longer of the two leads on most through-hole LEDs is the positive leads. Connecting it the wrong way, will cause this circuit to not work. Connect the negative lead of the LED to the horizontal rail on which the resistor is connected and connect the positive lead to an adjacent rail. Repeat this process for all three LEDs. Now its time to complete the circuit. We are going to use output ports 13, 12 and 11 for the input signal. Connect the positive lead of the LED on the right to pin 13, the LED in the center to 12 and the LED on the left to pin 11. The circuit is now complete. Power on the Arduino Uno by connecting it to your computer using the USB cable. The LEDs on the board turn on and the board powers up. \n\nBefore we work on our sketch, make sure to download the Arduino IDE for your specific operating system. I’ll leave a link to where you can download this software, in the description below. Once you’ve downloaded and installed the arduino IDE, go ahead and download the Sketch to run this program, using the link I’ve put in the description. \nhttps://www.dropbox.com/s/bivwdnehp7ln1iq/Sequential_blinking.ino?dl=0\n\nOpen the downloaded file. The program first creates 3 variables. LED1, LED2 and LED3. This allows us to change the output pins, without having to modify the entire program. The code in the setup part of the program tells the arduino that pins 13, 12 and 11 will be outputs. The loop portion of the program is where the actual instructions live. The first three digitalwrite functions turn on one LED at a time with a 200ms delay between each of them turning on. The next three digitalwrite functions turn off the leds with a 300ms delay between each LED. Now you can change the delay between each LED to change the rhythm of the LEDs turning on and off. I’ve found that using 200ms and 300ms gives it a nice smooth rhythm. Now you’re ready to upload the program to the board. Now click on the Tools tab of the Arduino Window, make sure the Arduino Uno is selected as your board and make sure you select the COM port your board is connected to. Most of the times there will be one COM port available and that will be the one you need to select. Click on the upload button on the top left hand corner of the screen to upload the program to the Uno. A green progress bar on the lower right hand corner will indicate upload progress. And unless any errors appear in the black message bar at the bottom of the screen, your board should now be running the program and the LEDs should be turning on and off like you can see here.\n\nHope this tutorial was useful. Please hit LIKE for more Arduino tutorials and subscribe to stay tuned.
led arduino รูปภาพที่เกี่ยวข้องในหัวข้อ

Basic LED setup for beginners – Arduino Project Hub New Update
08/03/2018 · Arduino tutorial: LED Matrix red 32×8 256 Led driven by MAX7219 (or MAX7221) and Arduino Uno
Lập trình Arduino căn bản 2: Điều khiển 8 led đơn (Basic Arduino programming 2: Control 8 LEDs) New Update led arduino
ดูข้อมูลที่เป็นประโยชน์เพิ่มเติมในหัวข้อ led arduino
Video chia sẻ nội dung: “Lập trình Arduino Uno điều khiển 8 led đơn: sáng dần, …….”\nLàm quen với cấu trúc vòng lặp for, cách sử dụng vòng lặp for:\nfor (initialization; condition; increment) {\n//statement(s);\n}\n(\nThe video shares the content: \”Arduino Uno programming with 8 single LEDs: light up, …….\”\nGet familiar with the structure of for loop, how to use for loop:\nfor (initialization; condition; increment) {\n// statement (s);\n})
led arduino ภาพบางส่วนในหัวข้อ

[TUTO] Arduino. Faire clignoter une LED – Arduino France Update
25/05/2021 · La LED Arduino clignotante intégrée à la carte est l’un des premiers exemples de sketch pour les débutants qui commencent à apprendre à programmer le microcontrôleur Arduino Uno ou Arduino Nano. Etudions quelques exemples : faire clignoter la LED intégrée, clignotement sans la fonction delay ();, faire clignoter plusieurs LED.
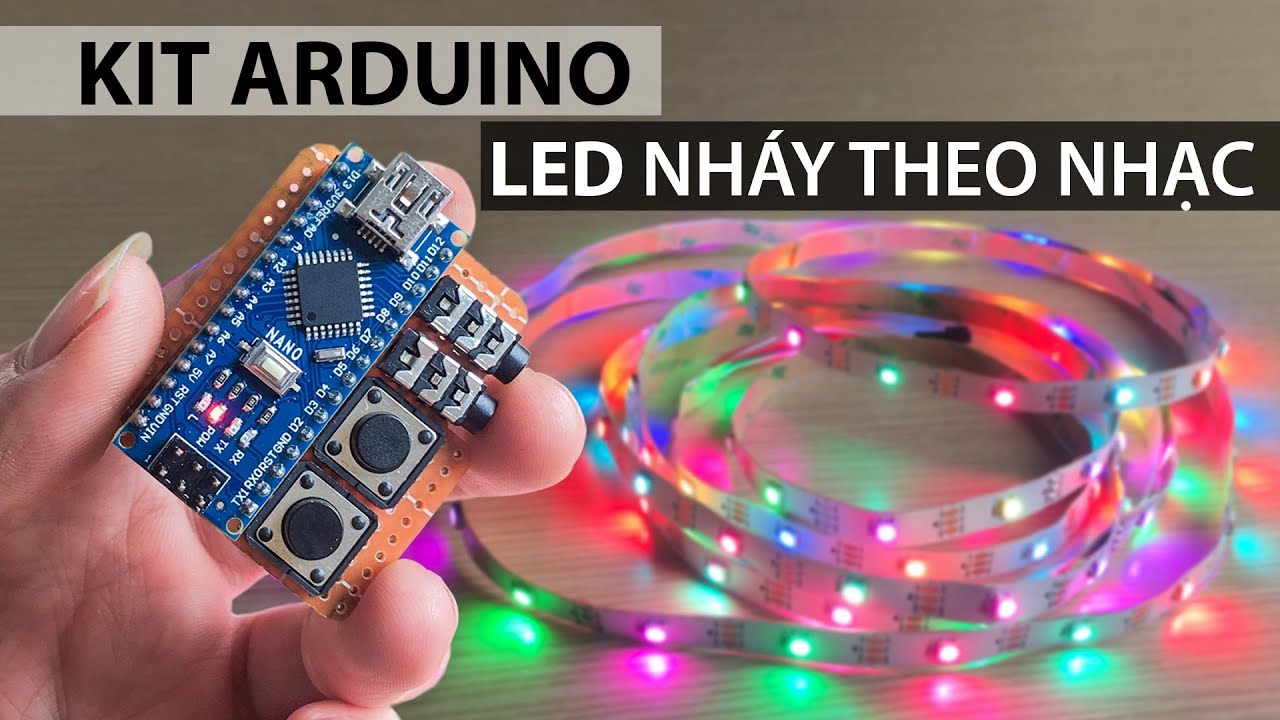
Chế mạch LED nháy theo nhạc bằng KIT ARDUINO 328 nano – Chơi tết New led arduino
ดูข้อมูลที่เป็นประโยชน์เพิ่มเติมในหัวข้อ led arduino
Dùng Kit Kit Arduino Nano 3.0 328 Mini CH340 để Chế mạch LED nháy theo nhạc bằng led dây dán 5050 RGB cuộn – Chơi tết \”.\nĐÂY LÀ KÊNH YOUTUBE CHÍNH THỨC CỦA BLK, ẤN ẤN SUBSCRIBE NGAY NHÉ ĐỂ ỦNG HỘ BÊN MÌNH \n———————————————————————-\n☞ Link đăng ký để theo dõi nhiều video hơn : https://www.youtube.com/channel/UCSeca92q0ZaRIcLOcsNsQyg?sub_confirmation=1\n☞ Facebook : https://www.facebook.com/banlinhkienMH/\n☞ Website : http://banlinhkien.vn\n———————————————————————-\nBanlinhkien.vn là kênh YOUTUBE của linh kiện điện tử Minh Hà chuyên mua bán linh kiện điện tử. Youtube Banlinhkien.vn hứa hẹn sẽ là cộng đồng điện tử nơi chia sẻ kiến thức, hướng dẫn test sản phẩm, chế đồ điện tử và review, so sánh các sản phẩm công nghệ mới giúp mọi người cập nhập được nhịp đập công nghệ.\n- Dưới đây là link mua linh kiện điện tử trong video :\n+ Kit Arduino Nano 3.0 328 Mini CH340 : https://banlinhkien.vn/goods-6135-kit-arduino-nano-3-0-328-mini-ch340.html\n+ Led Dây Dán 5050 WS2812 5V: https://banlinhkien.vn/goods-10704-led-day-dan-5050-ws2812-5v-khong-keo-1-met-60-bong-.html\n+ Nút Nhấn 4 Chân 12x12x8MM DIP: https://banlinhkien.vn/goods-9650-nut-nhan-4-chan-12x12x8mm-dip.html\n+ Jack Audio 3.5 PJ-313 5P (Loại Cắm) : https://banlinhkien.vn/goods-2078-jack-audio-3-5-pj-313-5p-loai-cam-.html\n+ Jump Đơn Cái 2.0MM 1x40P Thẳng : https://banlinhkien.vn/goods-1162-jump-don-cai-2-0mm-1x40p-thang.html\n+ Dây SM 2.54-2P 20CM : https://banlinhkien.vn/goods-5264-day-sm-2-54-2p-20cm.html\n+ PCB 7x9cm : https://banlinhkien.vn/goods-1225-pcb-7x9cm.html\n———————————————————————-\n- Số điện thoại liên hệ : 1900.03.44\n- Địa chỉ cơ sở để bạn mua Linh Kiện Điện Tử Minh Hà:\n+ Cơ Sở 1 – ĐH Bách Khoa/ Số 84, Đại Cồ Việt, Hà Nội.\n+ Cơ Sở 2 – ĐH Công Nghiệp/ Số 2 ngách 132/86 Nguyên Xá, Đường 32, Từ Liêm, Hà Nội.\n+ Cơ Sở 3 – HVKT Quân Sự/ Số 25 Đặng Thùy Trâm, Cầu Giấy, Hà Nội.\n+ Cơ Sở 4 – Chợ Nhật Tảo/ Số 106/5/ Nguyễn Kim/ P.6/ Q.10/ HCM.\n———————————————————————–\n☞ HÃY ĐỂ LẠI COMMENT ĐÓNG GÓP Ý CHO BÊN MÌNH NHA.
led arduino ภาพบางส่วนในหัวข้อ
Como acender e piscar um LED no Arduino – tecdicas New Update
1 LED; 1 Arduino com cabo (estamos utilizando a versão com 5v) 1 resistor de 220 ohms ou 120 ohms (dependendo do led que for utilizar) 1 protoboard e 2 fios (opcional) Neste guia soldamos um resistor na anodo do LED, portanto não utilizamos um protoboard, no entanto é possível utilizar um normalmente.
Thử tự chế Led Ambilight cho PC bằng Arduino và cái kết quá chất, anh em nghiện PC thích điều này Update New led arduino
อัพเดทใหม่ในหัวข้อ led arduino
Anh em nghiện PC, nghiện SET UP không gian chắc chắn thích bộ này nhỉ, có góp ý gì comment bên dưới giúp mình nha. Thay hộp nhựa nữa là bao đẹp, trong video mình làm hộp hơi cùi bắp tí ^^\nHƯỚNG DẪN BẰNG HÌNH ẢNH TẠI ĐÂY\nLink download Code : https://nshopvn.com/blog/led-ambilight-la-gi-huong-dan-lam-led-ambilight-voi-arduino/\n———————————————————————-\n🛒 LINK SẢN PHẨM:\n- Arduino nano : https://nshopvn.com/product/arduino-nano-v3-0-atmega328p-khong-kem-day-cap-usb/\n- Led dây WS2812 : https://nshopvn.com/product/led-day-ws2812-5050-5-vdc/?variant=41901\n- Nguồn adapter 5V 3A : https://nshopvn.com/product/nguon-adapter-5v-3a-2/\n- Jack nối kẹp led: https://nshopvn.com/product/jack-noi-led-3p-10cm/\n- Jack cắm DC :\nhttps://nshopvn.com/product/jack-dc-cai-co-day/\nhttps://nshopvn.com/product/jack-dc-5-5-khoa-oc-loai-tot/\n- Hộp nhựa :\nhttps://nshopvn.com/product/hop-nhua-gai-ii-85x50x22/\n———————————————————————-\n📞 LIÊN HỆ \u0026 ĐỊA CHỈ :\n☞ Website: https://nshopvn.com/\n☞ Số điện thoại liên hệ mua hàng: 0902 643 978 | 093 27 23 186\n☞ Số điện thoại hỗ trợ kỹ thuật: 0931 43 43 03 | 0896 441 229\n☞ Địa chỉ cơ sở để bạn đến mua trực tiếp: \n+ Chi nhánh 1: số 1 Bùi Xuân Phái, Tây Thạnh, Tân Phú, TP. HCM \n+ Chi nhánh 2: số 7 Trần Hưng Đạo, Hiệp Phú, Quận 9, TP. HCM\n———————————————————————-\n🌏 THÔNG TIN KÊNH:\n☞ Website: https://nshopvn.com/\n☞ Facebook: https://www.facebook.com/dientunshop\n☞ Group trao đổi kỹ thuật: https://www.facebook.com/groups/codientuvietnam/\n☞ Shopee: https://shopee.vn/dientunshop\n☞ Lazada: https://www.lazada.vn/shop/nshop-linh-kien-dien-tu/\n———————————————————————–\n☞ HÃY ĐỂ LẠI COMMENT GÓP Ý CHO NSHOP NHA
led arduino รูปภาพที่เกี่ยวข้องในหัวข้อ

สอนใช้งาน Arduino สัญญาณ Digital OutPut ควบคุม LED ไฟวิ่ง … Update 2022
Arduino Web Sever (ควบคุม LED ด้วย Button) Arduino Web Sever (ควบคุม LED ด้วย Checkbox) Arduino Web Sever (using SD Card for Page Links) Arduino Web Sever (using SD Card for Show image) _____ Arduino control Motor . Arduino control Motor (เปลี่ยนservo SG90 motorให้หมุนได้360)
BÀI 1-VIẾT CHƯƠNG TRÌNH BẬT TẮT LED ARDUINO 2022 New led arduino
ข้อมูลใหม่ในหัวข้อ led arduino
BÀI 1-VIẾT CHƯƠNG TRÌNH BẬT TẮT LED ARDUINO\nHỌC LẬP TRÌNH ARDUINO\nDANH SÁCH VIDEO HỌC LẬP TRÌNH ARDUINO\nhttp://bit.ly/2VWJeCP\nTrang tải code (pass giải nén là laptrinhnhe.com)\nhttps://laptrinhnhe.com/category/bai-giang-youtube/bg-lap-trinh-arduino/\nĐĂNG KÝ KHÓA HỌC LẬP TRÌNH ARDUINO ONLINE CHÍNH THỨC ĐỂ NHẬN ĐƯỢC NỘI DUNG BÀI GIẢNG VÀ SỰ HỖ TRỢ ĐẦY ĐỦ CHI TIẾT NHẤT NHÉ!\nhttps://laptrinhnhe.com/\nP/S: Đừng quên nhấn đăng ký kênh, like video, chia sẽ video, nhấn các quảng cáo trên video nếu thấy, đó là cách để ủng hộ kênh phát triển xa hơn, cảm ơn các anh em nhiều nhiều.\nTag:tự học arduino, tự học lập trình arduino, hướng dẫn học arduino, học arduino online, học arduino nhanh, lập trình arduino,\nVIẾT CHƯƠNG TRÌNH BẬT TẮT LED ARDUINO PIC C, lập trình điều khiển led đơn arduino, bật tắt led đơn gian arduino, lập trình chớp tắt led arduino, điều khiển led chớp tắt arduino\n#tuhocarduino #laptrinharduino #tuhoclaptrinharduino \nLiên hệ: https://laptrinhnhe.com/\nHoặc facebook https://www.facebook.com/xuankien.nguyen.3\n(Số điện thoại hotline có sử dụng zalo)
led arduino รูปภาพที่เกี่ยวข้องในหัวข้อ
ดูข้อมูลหัวข้อเพิ่มเติม led arduino
Arduino – LED – Blink | Arduino Tutorial ล่าสุด
Connect Arduino to PC via USB cable. Open Arduino IDE, select the right board and port. On Arduino IDE, Go to File Examples 01.Basics Blink example. . /* Blink Turns an LED on for one second, then off for one second, repeatedly. Most Arduinos have an on-board LED you can control. On the UNO, MEGA and ZERO it is attached to digital pin 13, on …
+ อ่านข้อมูลเพิ่มเติมได้ที่นี่
Tự học Arduino bài 2: Điều khiển LED bằng nút nhấn New led arduino
ข้อมูลใหม่ในหัวข้อ led arduino
BANLINHKIEN.VN XIN GỬI VIDEO : \” Tự học Arduino bài 2: Điều khiển LED bằng nút nhấn \”.\nĐÂY LÀ KÊNH YOUTUBE CHÍNH THỨC CỦA BLK, ẤN ẤN SUBSCRIBE NGAY NHÉ ĐỂ ỦNG HỘ BÊN MÌNH \n———————————————————————-\nBài trước chúng ta đã đi tìm hiểu về cách xuất dữ liệu số trên Arduino thông qua ví dụ về chớp tắt LED đơn, Hôm nay chúng ta sẽ cùng tìm hiểu về đầu vào số của Arduino thông qua các ví dụ đơn giản là điều khiển LED bằng nút nhấn, giao tiếp nút nhấn. Chuỗi video này sẽ giúp các bạn tự học Arduino 1 cách dễ dàng nhất với bộ KIT học tập Arduino cơ bản.\n☞ Facebook Miền Bắc : https://www.facebook.com/banlinhkienMH/\n☞ Facebook Miền Nam : https://www.facebook.com/banlinhkiennhattao.vn/\n☞ Website : http://banlinhkien.vn\n☞ Link đăng ký để theo dõi nhiều video hơn : https://www.youtube.com/channel/UCSeca92q0ZaRIcLOcsNsQyg?sub_confirmation=1\n———————————————————————-\nBanlinhkien.vn là kênh YOUTUBE của linh kiện điện tử Minh Hà chuyên mua bán linh kiện điện tử. Youtube Banlinhkien.vn hứa hẹn sẽ là cộng đồng điện tử nơi chia sẻ kiến thức, hướng dẫn test sản phẩm, chế đồ điện tử và review, so sánh các sản phẩm công nghệ mới giúp mọi người cập nhập được nhịp đập công nghệ.\nLink bài 1: Tìm hiểu về cách xuất dữ liệu số trên Arduino thông qua ví dụ về chớp tắt LED đơn\nhttps://www.youtube.com/watch?v=rUNlCKcWTPg\u0026t\n- Dưới đây là link mua linh kiện điện tử trong video :\n+ Bộ Kit Học Tập Arduino UNO R3 Cơ Bản giảm giá còn 359k\nhttps://banlinhkien.com/bo-kit-hoc-tap-arduino-uno-r3-co-ban-p8231821.html\n\n———————————————————————-\n- Số điện thoại liên hệ : 1900.03.44\n- Địa chỉ cơ sở để bạn mua Linh Kiện Điện Tử Minh Hà:\n+ Cơ Sở 1 – ĐH Bách Khoa/ Số 84, Đại Cồ Việt, Hà Nội.\n+ Cơ Sở 2 – ĐH Công Nghiệp/ Số 2 ngách 132/86 Nguyên Xá, Đường 32, Từ Liêm, Hà Nội.\n+ Cơ Sở 3 – HVKT Quân Sự/ Số 25 Đặng Thùy Trâm, Cầu Giấy, Hà Nội.\n+ Cơ Sở 4 – Chợ Nhật Tảo/ Số 106/5/ Nguyễn Kim/ P.6/ Q.10/ HCM.\n———————————————————————–\n☞ HÃY ĐỂ LẠI COMMENT ĐÓNG GÓP Ý CHO BÊN MÌNH NHA.
led arduino ภาพบางส่วนในหัวข้อ
Bài 2: Cách làm đèn LED nhấp nháy theo … – Arduino Update 2022
Arduino Uno; 01 LED (khuyên dùng loại LED siêu sáng 5mm, bạn chỉ cần ra tiệm mua LED siêu sáng 5mm là người ta bán thôi) 01 điện trở 220 Ohm (người ta không bán lẻ từng con điện trở, vì vậy bạn nên mua luôn một bì điện trở khoảng 100 con …
Chế Đồng Hồ LED Quay Với Arduino Nano 2022 New led arduino
ข้อมูลใหม่ในหัวข้อ led arduino
Video trình bày cách làm đồng hồ LED quay hiển thị bằng kỹ thuật POV display.\n\n+ Code \u0026 sơ đồ mạch: https://drive.google.com/drive/folders/1sLT6NMP_UcSWKBEgvSU1-u9huuo5B-tf?usp=sharing\n———————————————————————\r\nTrack: Elektronomia \u0026 RUD – Memory [NCS Release]\nMusic provided by NoCopyrightSounds.\nWatch: https://youtu.be/EnuGdwI0W1g\nFree Download / Stream: http://ncs.io/Memory\n———————————————————————\r\nTrack: Elektronomia \u0026 RUD – Rollercoaster [NCS10 Release]\nMusic provided by NoCopyrightSounds.\nWatch: https://youtu.be/h11VGG-ElpI\nFree Download / Stream: https://ncs.io/Rollercoaster\n———————————————————————\n#donghoLEDquay #donghoPOV
led arduino คุณสามารถดูภาพสวย ๆ ในหัวข้อ

LED – Arduino Reference Update New
Allows Arduino/Genuino boards to simplify the use of the LED. This library simplify the use of a LED. It contains many function to manage a LED. Author: Giuseppe Martini. Maintainer: Giuseppe Martini. Read the documentation. Compatibility. This library is compatible with all architectures so you should be able to use it on all the Arduino boards.
+ อ่านข้อมูลเพิ่มเติมได้ที่นี่
Tự học Arduino bài 4: Điều khiển LED Matrix New led arduino
ข้อมูลเพิ่มเติมเกี่ยวกับหัวข้อ led arduino
BANLINHKIEN.VN XIN GỬI VIDEO : \” Tự học Arduino bài 4: Điều khiển LED Matrix \”.\nTiếp nối chuỗi video tự học Arduino, video ngày hôm nay mình và các bạn sẽ cùng tìm hiểu cách điều khiển led matrix 8×8 bằng arduino UNO với bộ KIT học tập Arduino UNO R3 cơ bản.\n———————————————————————-\nLINK SẢN PHẨM\n+ Bộ Kit Học Tập Arduino UNO R3 Cơ Bản\nhttps://banlinhkien.com/bo-kit-hoc-tap-arduino-uno-r3-co-ban-p8231821.html\n+ KIT Arduino UNO R3 CH340G\nhttps://banlinhkien.com/kit-arduino-uno-r3-ch340g-p6649363.html\n+ Bộ Kit Học Tập Arduino UNO R3 RFID\nhttps://banlinhkien.com/bo-kit-hoc-tap-arduino-uno-r3-rfid-p8231820.html\n+ Led Matrix 8×8\nhttps://banlinhkien.com/search?q=Led+Matrix+8×8\n\nLink Code tham khảo:\n+ https://drive.google.com/file/d/1gt9Wytrm89qo-eKP40wpY2Ow6X7zpOfE/view?usp=sharing\n\nLINK NHẠC:\n+ Song: Markvard – Obsessed (Vlog No Copyright Music)\nMusic provided by Vlog No Copyright Music.\nVideo Link: https://youtu.be/4qkJ_nAG_w0\n———————————————————————-\nTHÔNG TIN KÊNH:\nBanlinhkien.vn là kênh YOUTUBE của linh kiện điện tử Minh Hà chuyên mua bán linh kiện điện tử. Còn Youtube Banlinhkien.vn là kênh cộng đồng điện tử nơi chia sẻ kiến thức, hướng dẫn sử dụng sản phẩm, test sản phẩm, dạy học điện tử, chế đồ điện tử và review, so sánh các sản phẩm công nghệ để giúp người xem có những sự lựa chọn tốt nhất, ngoài ra còn giúp người xem cập nhập được nhịp đập công nghệ, học tập, nâng cao kiến thức về điện tử và giải trí.\n☞ Facebook Miền Bắc : https://www.facebook.com/banlinhkienMH/\n☞ Facebook Miền Nam : https://www.facebook.com/banlinhkiennhattao.vn/\n☞ Website : http://banlinhkien.com\n☞ Link ĐĂNG KÝ KÊNH để theo dõi nhiều video hơn : https://www.youtube.com/channel/UCSeca92q0ZaRIcLOcsNsQyg?sub_confirmation=1\n———————————————————————-\nLIÊN HỆ \u0026 ĐỊA CHỈ :\n- Số điện thoại liên hệ mua hàng : 1900.03.44\n- Số điện thoại support: 024.66.85.11.66\n- Website: http://banlinhkien.com\n- Địa chỉ cơ sở để bạn mua Linh Kiện Điện Tử Minh Hà:\n+ Cơ Sở 1 – ĐH Bách Khoa/ Số 84, Đại Cồ Việt, Hà Nội.\n+ Cơ Sở 2 – ĐH Công Nghiệp/ Số 2 ngách 132/86 Nguyên Xá, Đường 32, Từ Liêm, Hà Nội.\n+ Cơ Sở 3 – HVKT Quân Sự/ Số 25 Đặng Thùy Trâm, Cầu Giấy, Hà Nội.\n+ Cơ Sở 4 – Số 71 Ngô Quyền – P.6 – Q.10 – HCM\n———————————————————————–\n☞ HÃY ĐỂ LẠI COMMENT ĐÓNG GÓP Ý CHO BÊN MÌNH NHA.\n#Banlinhkien
led arduino คุณสามารถดูภาพสวย ๆ ในหัวข้อ

Arduino – Đèn LED nhấp nháy – dongthoigian อัปเดต
21/02/2022 · Arduino – LED mờ dần. Ví dụ này minh họa việc sử dụng hàm analogWrite trong việc tắt đèn LED. AnalogWrite sử dụng điều chế độ rộng xung (PWM), bật và tắt chân kỹ thuật số rất nhanh với các tỷ lệ khác nhau giữa bật và tắt, để tạo ra hiệu ứng mờ dần.
BÀI 5 : ARDUINO ĐIỀU KHIỂN LED 7 ĐOẠN – PHẦN 2 Update 2022 led arduino
ข้อมูลใหม่ในหัวข้อ led arduino
Trong phần 2 này tôi hướng dẫn chi tiết các bạn lập trình với Arduino để điều khiển 1 con LED 7 đoạn hiển thị các số tự nhiên từ 0 tới 9.\nMọi thắc mắc các bạn để lại comment phía dưới tôi sẽ trả lời.
led arduino ภาพบางส่วนในหัวข้อ

Arduino – Button – LED | Arduino Tutorial Update 2022
Connect Arduino to PC via USB cable. Open Arduino IDE, select the right board and port. Copy the above code and open with Arduino IDE. Click Upload button on Arduino IDE to upload code to Arduino. Press and keep pressing the button several seconds. See the change of LED’s state.
Lập trình Arduino cơ bản – Bài 2: Điều khiển LED đơn nhấp nháy New 2022 led arduino
ข้อมูลเพิ่มเติมเกี่ยวกับหัวข้อ led arduino
Video này là video hướng dẫn lập trình arduino – Bài 2: Điều khiển LED đơn nhấp nháy\nSource code: https://bit.ly/2Kjj9ui\nFanpage: https://fb.com/VDLapTrinh/\n📣 Đừng quên Subscribe để xem thật nhiều video mới nhé! \n🎈 Đăng ký kênh [MIỄN PHÍ]: http://bit.ly/2T6pz3S\n——————————\nDanh sách Học lập trình IoT với Arduino: https://bit.ly/2RGoIHu\nDanh sách Học lập trình Arduino cơ bản: https://bit.ly/3aaMPEn\nTham gia Group Facebook hỗ trợ, giải đáp: https://fb.com/groups/267756707544191\n——————————\nCài đặt Arduino IDE: https://youtu.be/4HSp48ChMmQ\nBài 1: Hello World https://youtu.be/Z_rcpOQSt2k\nBài 2: Điều khiển LED đơn nhấp nháyhttps://youtu.be/BUynN7HBOwY\nBài 3: Đọc giá trị Analog https://youtu.be/hlRAutS0Dr0\nBài 4: 6 LED sáng dần tắt dần https://youtu.be/uYw1-bsOllY\nBài 5: LED xanh vàng đỏ giao thông https://youtu.be/lhmP0Fv5Jko\nBài 6: Nút nhấn điều khiển đèn LED https://youtu.be/YuoM7rn5nd0\nBài 7: 3 nút nhấn điều khiển 3 LED https://youtu.be/HQfYByXvIbo\nBài 8: Buzzer https://youtu.be/Ex1QVgmQjr8\n…\nBài 20:\n——————————-\n#ArduinoTutorial\n#ArduinoIoT
led arduino คุณสามารถดูภาพสวย ๆ ในหัวข้อ

ARDUINO LED | Tutorial für den Schaltungsaufbau in 4 Schritten Update New
05/07/2021 · Abb. 3: Die Arduino LED-Schaltung in der Zeichnung 3. Anschließen des Arduinos. Zum Coden wird hier die Arduino-Entwicklungsumgebung verwendet, die Du hier für Windows, Mac und Linux herunterladen kannst. Unter Windows führt Dich ein Assistent durch die Installation, auf dem Mac wird die IDE einfach ausgeführt.
+ อ่านข้อมูลเพิ่มเติมได้ที่นี่
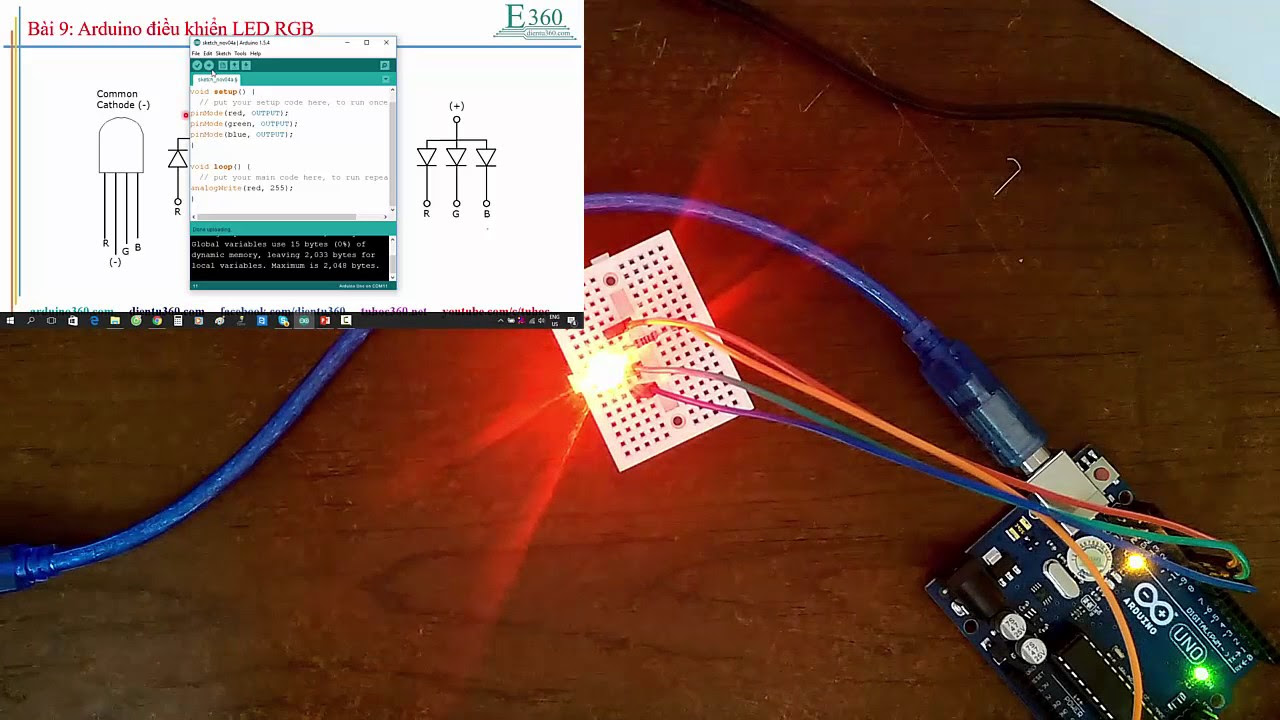
Tự học Arduino: Bài 9 – Arduino điều khiển LED RGB New Update led arduino
ข้อมูลเพิ่มเติมเกี่ยวกับหัวข้อ led arduino
Website: arduino360.com\nPhone: 0967.76.76.40\nĐăng kí khóa học arduino: \nhttp://tuhoc360.net/?lp_course=arduino-tu-a-den-z
led arduino ภาพบางส่วนในหัวข้อ
Accendiamo un LED con Arduino – RobotStore.it 2022 New
Molte schede Arduino già hanno montato sulla scheda stessa un LED attaccato al pin 13. Se seguite questo esempio senza collegare elettronica esterna lo vedrete lampeggiare. Il valore della resistenza collegata in serie con il LED potrebbe avere un valore leggermente differente; il LED si accenderà anche con valori della resistenza fino a un …
How to make a 8x8x8 LED Cube at Home 2022 New led arduino
อัพเดทใหม่ในหัวข้อ led arduino
Learn- how to make the most complex LED cube. I used prototyping board to create circuit later on I designed PCB layout and ordered from http://pcbway.com\n\n\nRequired Material-\n1. Blue LED 5mm or\n2. Blue diffused LED 3mm\n2. 74HC595 \n3. Prototyping board\n4. Tinted copper wire\n5. BD241 Transistor\n\nTips:- Try use \nCircuit diagram and code- https://www.mediafire.com/folder/z79wwa0xke37v/\n\n\nFollow me on Instagram and get regular updates- https://www.instagram.com/tapendramandal\n\nThanks for watching my video.
led arduino รูปภาพที่เกี่ยวข้องในหัวข้อ

Arduino: LEDs ansteuern – so geht’s – CHIP Update New
06/04/2018 · Schließen Sie dann eine LED, wie im Bild gezeigt, an Ihren Arduino an. Starten Sie als nächstes die Arduino IDE. Im “void setup ()” müssen Sie nun als erstes den Pin, an dem die LED angeschlossen ist, als Ausgang definieren. Dies geht ganz einfach mit dem Befehl “pinMode (13, OUTPUT);” (ohne Anführungszeichen).
Cách Làm Chữ LED Với Arduino Update led arduino
อัพเดทใหม่ในหัวข้อ led arduino
Làm linh tinh với arduino.\nNguyên liệu\n- Arduino Uno R3 : https://bit.ly/2MBTAGm\n- Led Ma trận : https://bit.ly/2MAQfY8\n\nFacebook: https://fb.com/maxranhproductions\n\nNhạc:\nNekzlo – Alive\nMusic promoted by Vlog No Copyright Music.\nLink: https://youtu.be/Yq2zJUWT2HU
led arduino ภาพบางส่วนในหัวข้อ

《Arduino入門》第三篇:用程式控制LED Update 2022
15/01/2020 · 在編寫Arduino程式之前,我們先利用Arduino Uno開發板,把LED點亮,練習一下接線。. LED燈(LED lamp)是指利用發光二極體(LED)作為光源的燈具,一般使用半導體LED製成。. LED燈的壽命和發光效率可達白熾燈的幾倍。. 而每種顏色所需的電壓都不太一樣:. 紅 …
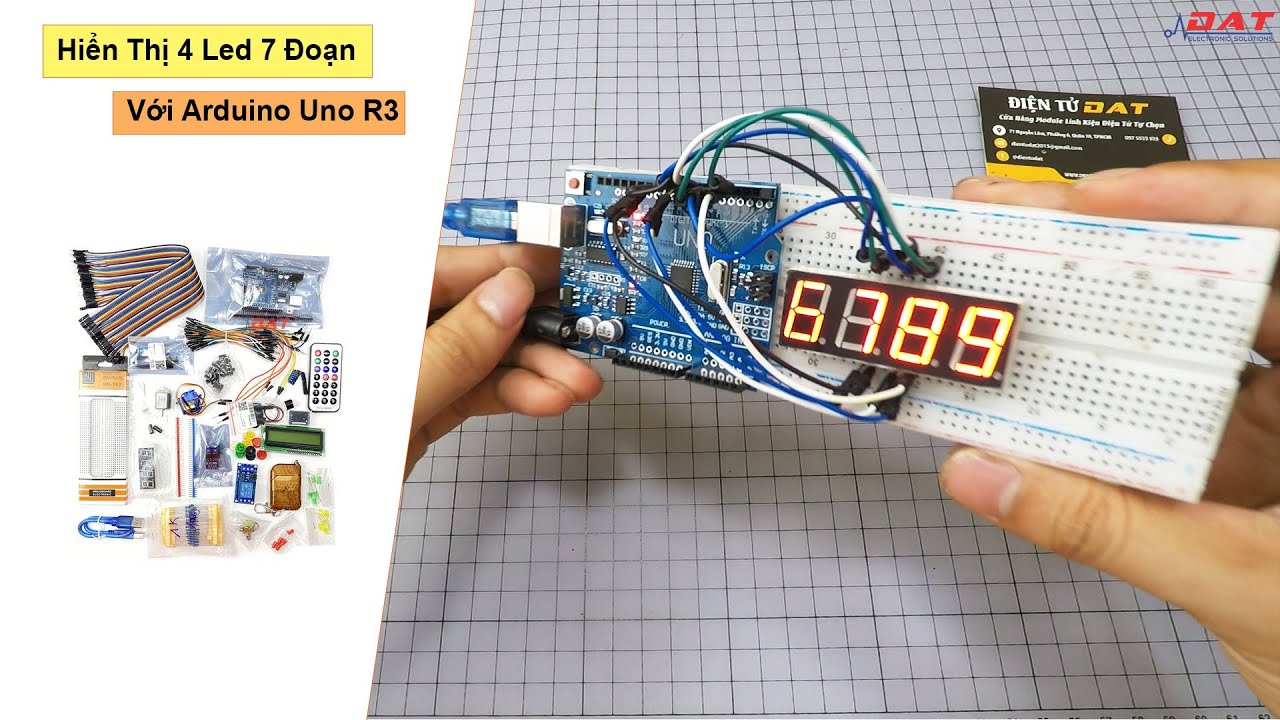
Hiển Thị 4 Led 7 Đoạn Với Arduino Uno R3 | Điện tử DAT Update 2022 led arduino
ดูข้อมูลที่เป็นประโยชน์เพิ่มเติมในหัวข้อ led arduino
#dientudat #linhkiendientu #dientutphcm\nVideo hướng dẫn thực hành hiển thị 4 led 7 đoạn thông qua arduino Uno R3, với cơ chế quét led đơn giản mà không cần sử dụng đến thư viện giúp việc hiển thị số lên 4 led 7 đoạn đơn giản và dễ sử dụng hơn . Đồng thời việc thay đổi và phát triển code sẽ dễ dàng hơn.\n Đường Dẫn Bài viết và Code : https://www.dientudat.com/hien-thi-4-led-7-doan-voi-arduino-uno-r3\n Đường dẫn chi tiết và đặt hàng sản phẩm : \n*Bộ Thực Hành Arduino R3 Cơ Bản V1 Phiên Bản Đặc Biệt Giao Tiếp RF: https://www.dientudat.com/bo-thuc-hanh-arduino-r3-co-ban-v1-phien-ban-dac-biet-giao-tiep-rf\n*Các sản phẩm tương tự khác : https://www.dientudat.com/kit-diy-thuc-hanh-tu-rap\n Để biết thêm thông tin và mua sản phẩm khách hàng vui lòng xem thông tin bên dưới.\n Thông tin liên hệ: \nĐiện Tử DAT\nĐịa chỉ: 71 Nguyễn Lâm, Phường 6, Quận 10, TPHCM\nSĐT: 097 5533 970\nEmail: [email protected]\nWebsite: https://www.dientudat.com\nFacebook: https://www.facebook.com/dientudat
led arduino ภาพบางส่วนในหัวข้อ
สอนใช้งาน Arduino สัญญาณ Digital OutPut ควบคุม LED ไฟวิ่ง … 2022 New
Arduino Web Sever (ควบคุม LED ด้วย Button) Arduino Web Sever (ควบคุม LED ด้วย Checkbox) Arduino Web Sever (using SD Card for Page Links) Arduino Web Sever (using SD Card for Show image) _____ Arduino control Motor . Arduino control Motor (เปลี่ยนservo SG90 motorให้หมุนได้360)
✳️Arduino Basic Led Blinking For Beginners (Very Easy) New led arduino
ดูข้อมูลที่เป็นประโยชน์เพิ่มเติมในหัวข้อ led arduino
1) Step – Download Arduino software- https://goo.gl/mXkfKc\n\n2) Step – connect all the negative of the leds then connect to the ground pin of Arduino uno\n\n3) Step – join all pin and led as shown in video\n\n4) Step – Download project from here https://goo.gl/nJkLHT\n\nmusic was provided by NoCopyrightSounds\ntrack-Itro \u0026 Tobu – Cloud 9 [NCS Release]\nmusic- https://www.youtube.com/watch?v=VtKbiyyVZks\n\nNCS\n➞ Spotify http://spoti.fi/NCS\n➞ SoundCloud http://soundcloud.com/nocopyrightsounds\n➞ Facebook http://facebook.com/NoCopyrightSounds\n➞ Twitter http://twitter.com/NCSounds\n➞ Google+ http://google.com/+nocopyrightsounds\n\nTobu:\n➞ Spotify http://smarturl.it/Tobu_Spotify\n➞ SoundCloud https://soundcloud.com/7obu\n➞ Facebook https://www.facebook.com/tobuofficial\n➞ Twitter https://twitter.com/tobuofficial\n➞ YouTube https://www.youtube.com/user/tobuoffi…\n\nItro:\n➞ Spotify http://open.spotify.com/artist/6fEZjg…\n➞ Facebook https://www.facebook.com/officialitro\n➞ Twitter https://twitter.com/itromsc\n➞ YouTube https://www.youtube.com/user/official…\n➞ SoundCloud https://soundcloud.com/itro\n\n-~-~~-~~~-~~-~-\nPlease watch: \”Acid + Aluminium Foil = Flying Balloon\” \nhttps://www.youtube.com/watch?v=dInqARai95U\n-~-~~-~~~-~~-~-
led arduino ภาพบางส่วนในหัวข้อ

นี่คือการค้นหาที่เกี่ยวข้องกับหัวข้อ led arduino
Tìm kiếm có liên quan cho led arduino
ขอบคุณที่รับชมกระทู้ครับ led arduino
Articles compiled by Bangkokbikethailandchallenge.com. See more articles in category: MMO